Last Updated on May 1, 2024
Every website needs to take website backups from time to time. Because we don’t know what will happen tomorrow. so if you have a website then you must take backups regularly. In this tutorial, we are talking about how to restore Joomla backup on localhost with Kickstart.
Before restoring the akeeba backup, first you have to take the backup and download it to your computer. That is a very simple task to take a backup and manage it with the akeeba backup component in Joomla. Same thing with restoring to Akeeba backup but it required a plugin kickstart.
Restore Joomla Akeeba Backup using Kickstart
After getting the akeeba backup file in (.jpa or .zip) you have to make sure that your system fulfills the following requirements –
- The Joomla version of your akeeba backup that you are installing should be compatible with your existing PHP version.
- At the time of restoration, you will need a database username and database password and database name. So note down when you create a database in your localhost (default username is root and hostname is localhost).
- Note the admin username and password for superuser settings.
- Have you downloaded Kickstart from Akeeba?
After checking all important points you proceed with the restoration process. So There are the following steps below-
Step 1: Download the kickstart package.
Let’s See: How to install Joomla on localhost?
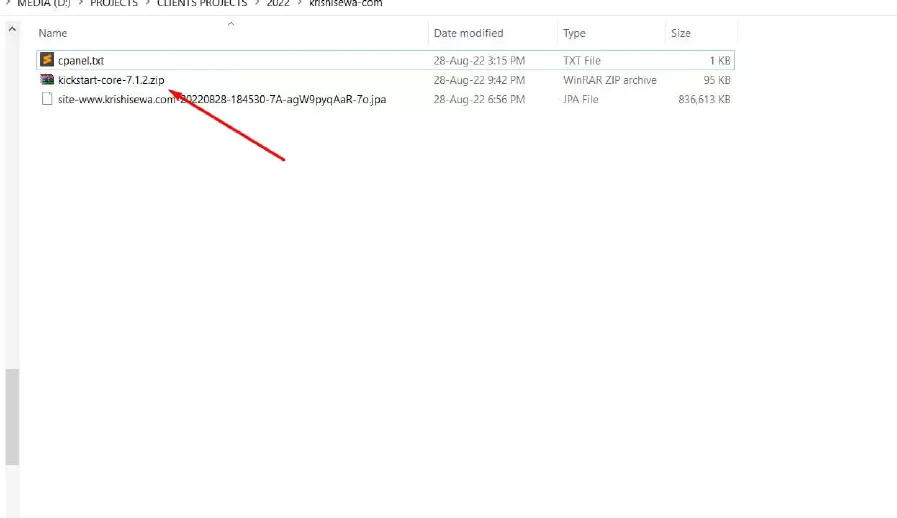
Step 2: Extract the akeeba kickstart package, you will get 2 files as below-
Step 3: Copy and paste these files into your root directory where you want to restore the backup. for example, if you are using XAMPP Server then you have to follow the path: htdocs/website name/
also, place there your akeeba backup .jpa

Step 4: Create a database from PHPMyAdmin

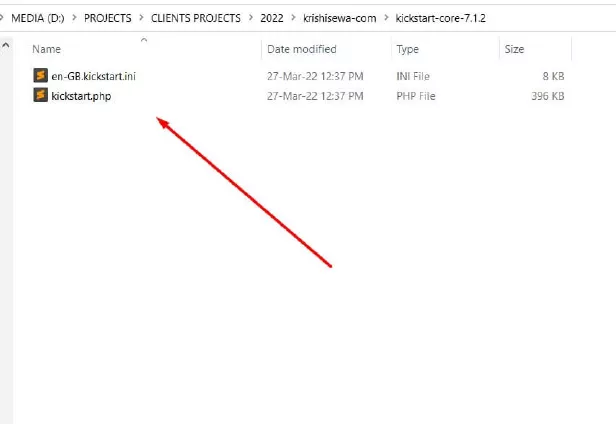
Step 5: Now run the backup using the localhost directory path, so you will get the list of 3 files to click on kickstart.php

Let’s See: How to access the Template files in Joomla?
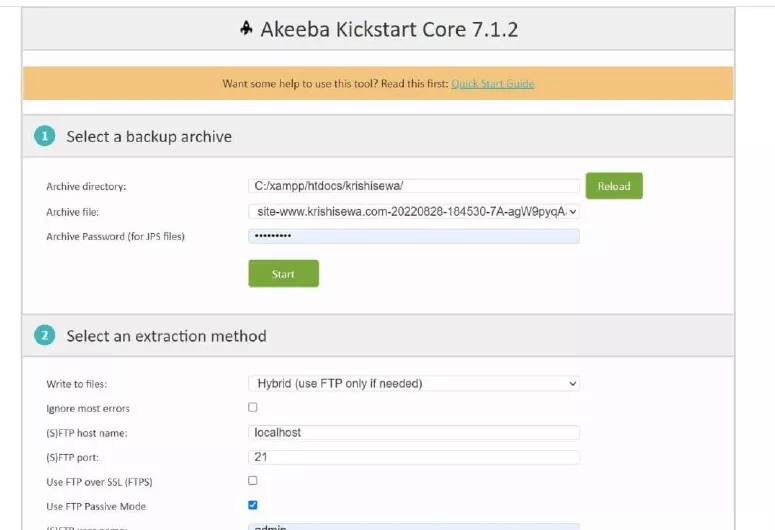
Akeeba kickstart restore in Joomla
Step 6: After running the URL you will get a warning message from akeeba kickstart where they have mentioned about it can be corrupt, so you recommended downloading a backup file by FTP. So if you don’t want to use FTP then skip it.

Step 7: Now you can click on the start button, after confirming the archive directory is correct.
Step 8: Extracting the process for the files

Step 9: In this step, you have to check the system settings in the Pre-installation check and make sure your system setting is the same as recommended.

Step 10: Enter the database name, username, password, and prefix.

Step 11: Now the database restoring process is started. So for completion.
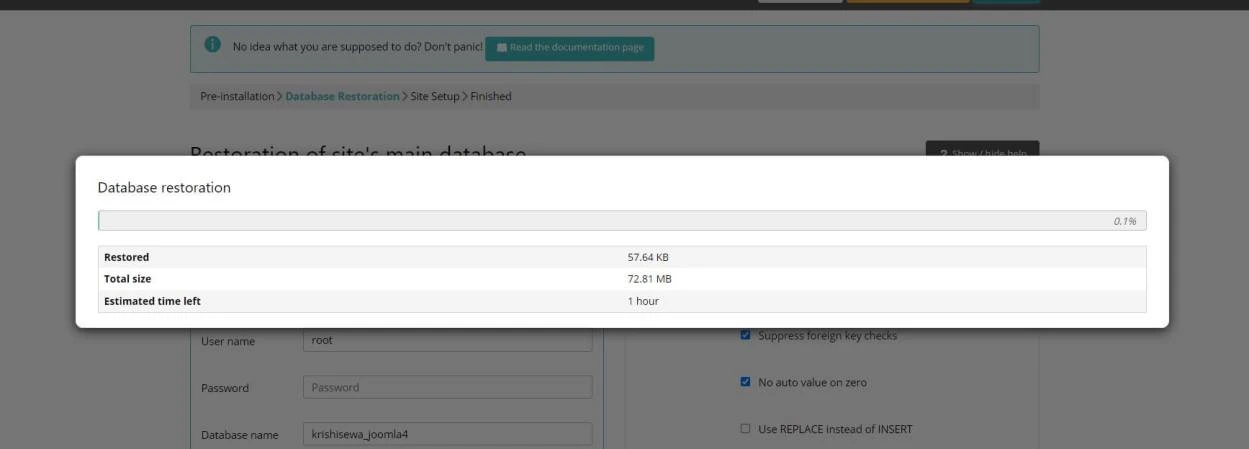
Step 12: Now database restoration has finished. Click on the Next Step.

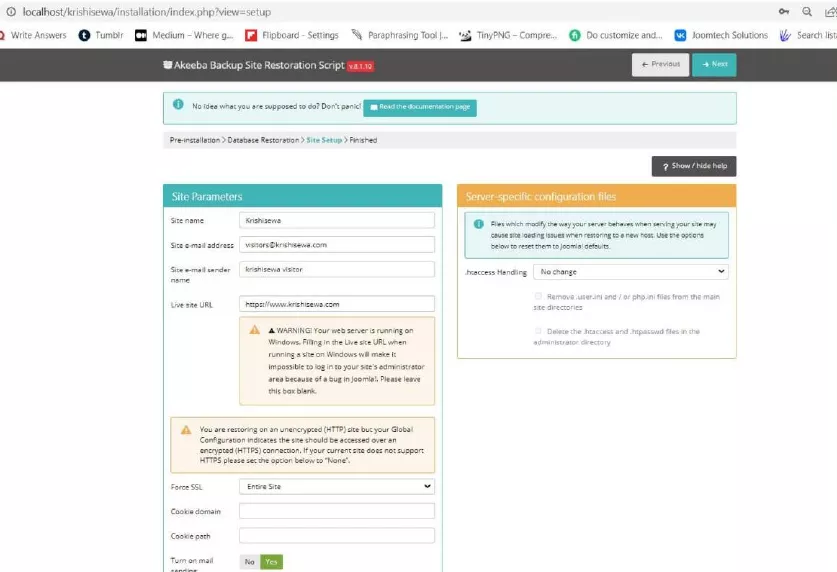
Step 13: Enter your Joomla website parameters like admin username and password, site name and email id, etc.
Step 14: Now your installation process has finished, here you can see the message to click on the Clean Up button.
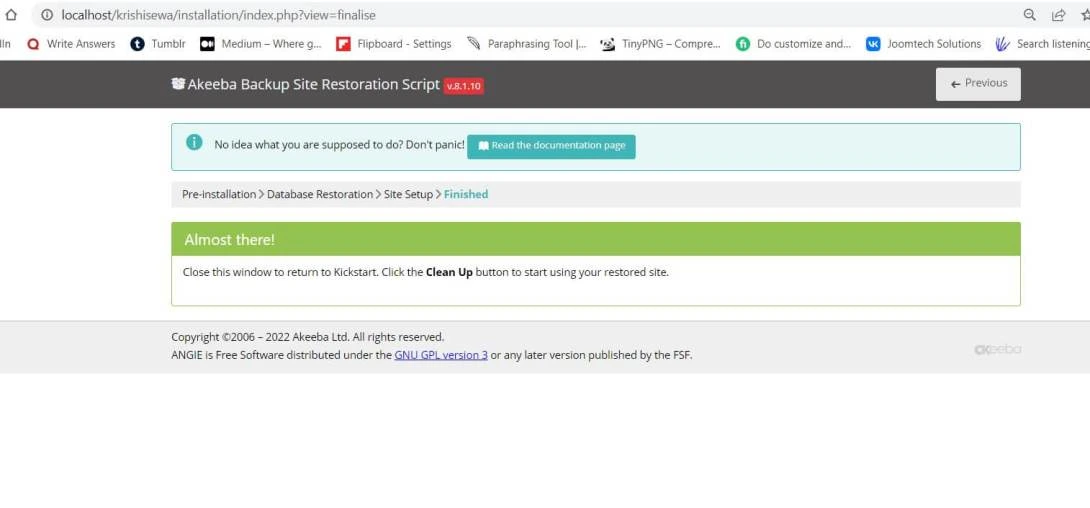
Step 15: Here you can see a button Clean Up. After clicking it will remove all unused files.

Step 16: Now finally you can see your website ready just click on any one button to see Back-End or Front-End.

Summary: I hope you have read the full article and now you can restore akeeba backup using kickstart into localhost without any issue. if you have still any issues you can contact me by comment or contact form. I will try to solve your problem. Subscribe to our newsletter to get useful tutorials.
See important tutorials here :
- How to Create a Contact Form in Joomla 4
- How to Check Module Position in Joomla3?
- Top 10 Joomla 4 Templates
Stay updated with our latest news, special offers, and exclusive updates directly in your inbox.