Last Updated on April 22, 2026
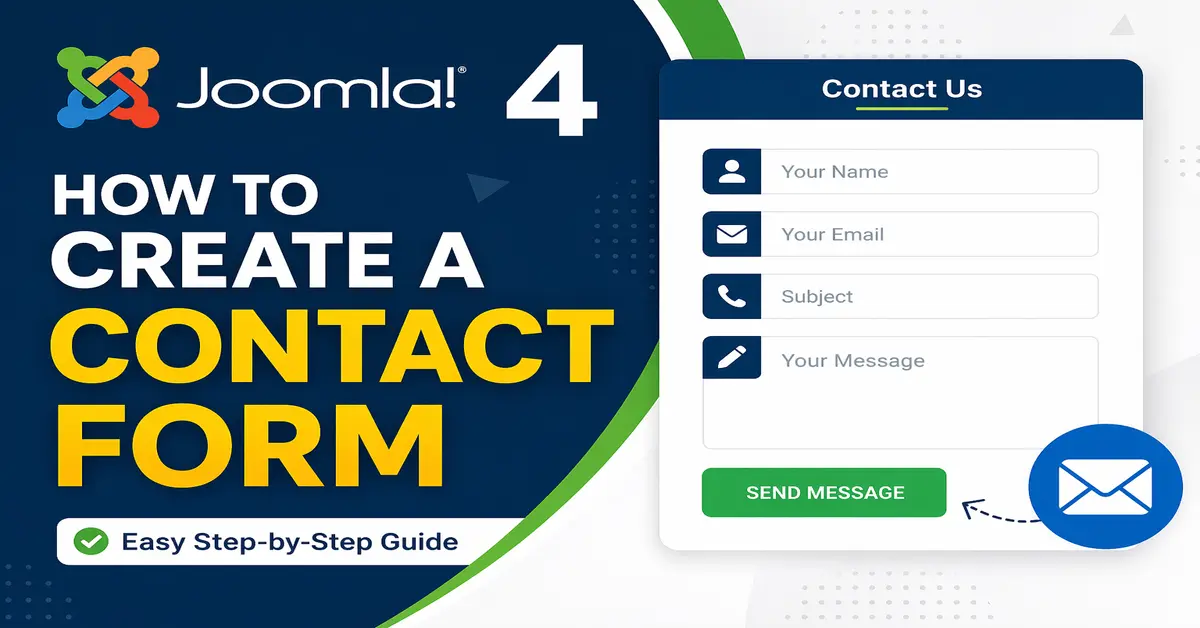
Creating a contact form is one of the most important steps for any website, whether you are using Joomla 4 or the latest Joomla versions.
In this guide, you will learn how to create a contact form in Joomla 4 step-by-step without coding. A contact form helps your visitors easily get in touch with you, send inquiries, or provide feedback.
👉 If you are using the latest version, you can also follow this detailed guide for a Joomla 5 contact form tutorial.
In this tutorial, we will use the default Joomla contact component, which allows users to submit messages that are sent directly to your email address. This method is simple, fast, and perfect for beginners.
However, keep in mind that the default Joomla contact form does not store messages in the database. It only sends emails, so if you need to save submissions, you may need to use a form extension.
Also, when users submit the form, they provide their email address. If your website has a privacy policy, you should clearly mention how this data will be used (for communication purposes only).
👉 In the next section, let’s start creating your contact form step-by-step.
How to Create a Contact Form in Joomla 4
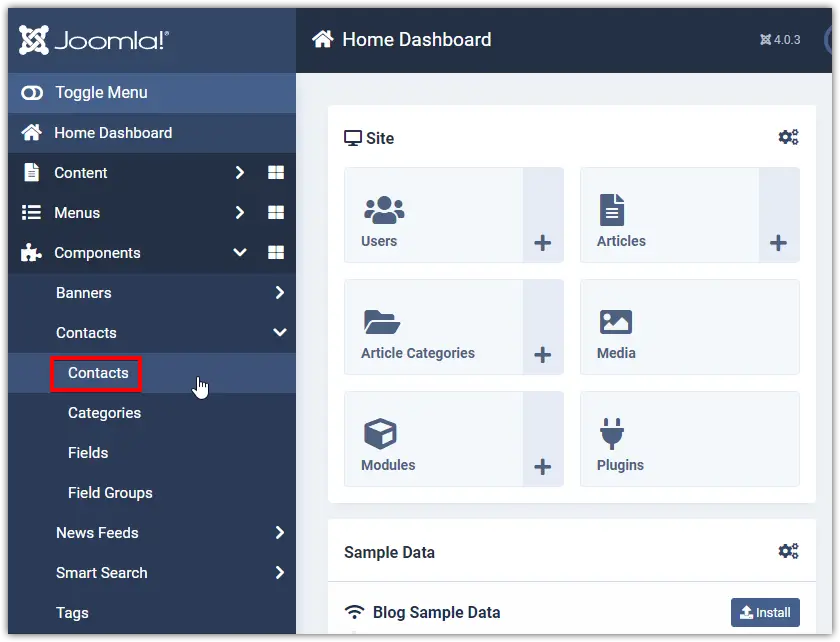
Before you begin, navigate to your website’s admin panel (or Home Dashboard). Check that you are logged in with your admin account.
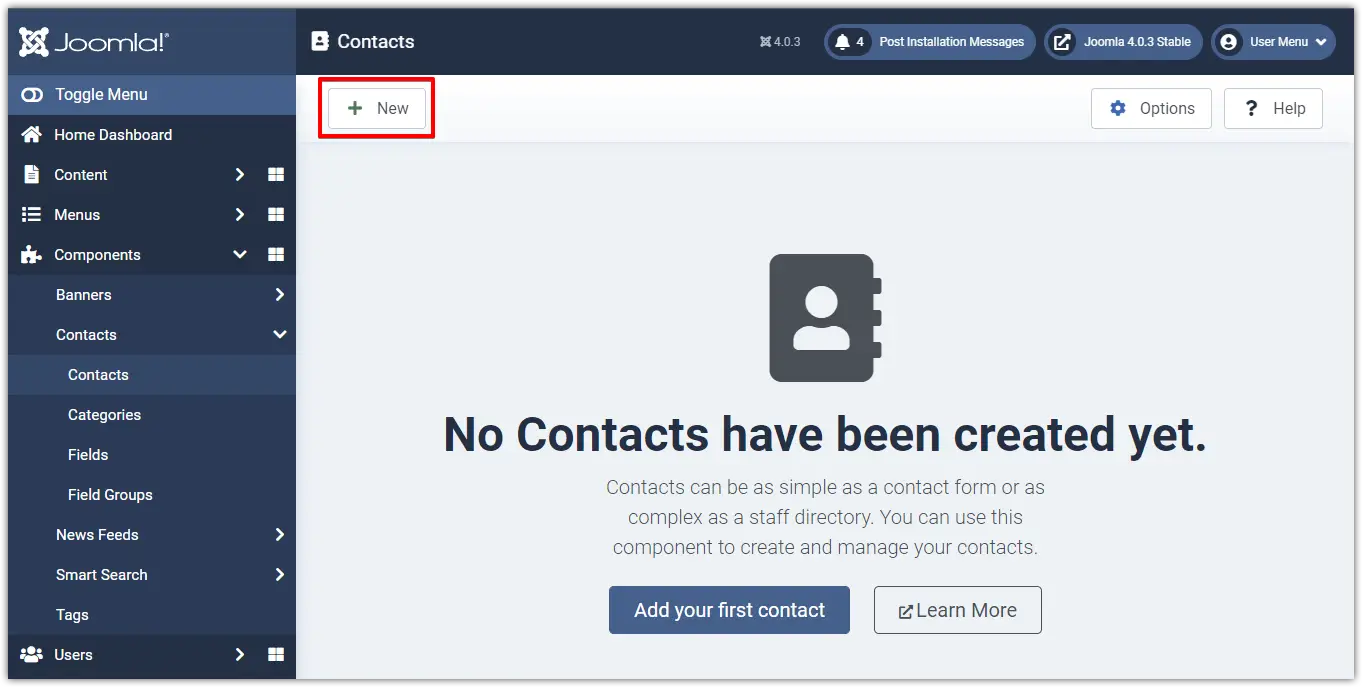
Go to Components > Contacts > Contacts:
Click on the New button:
Enter a name for your new contact form (required) and other information here:
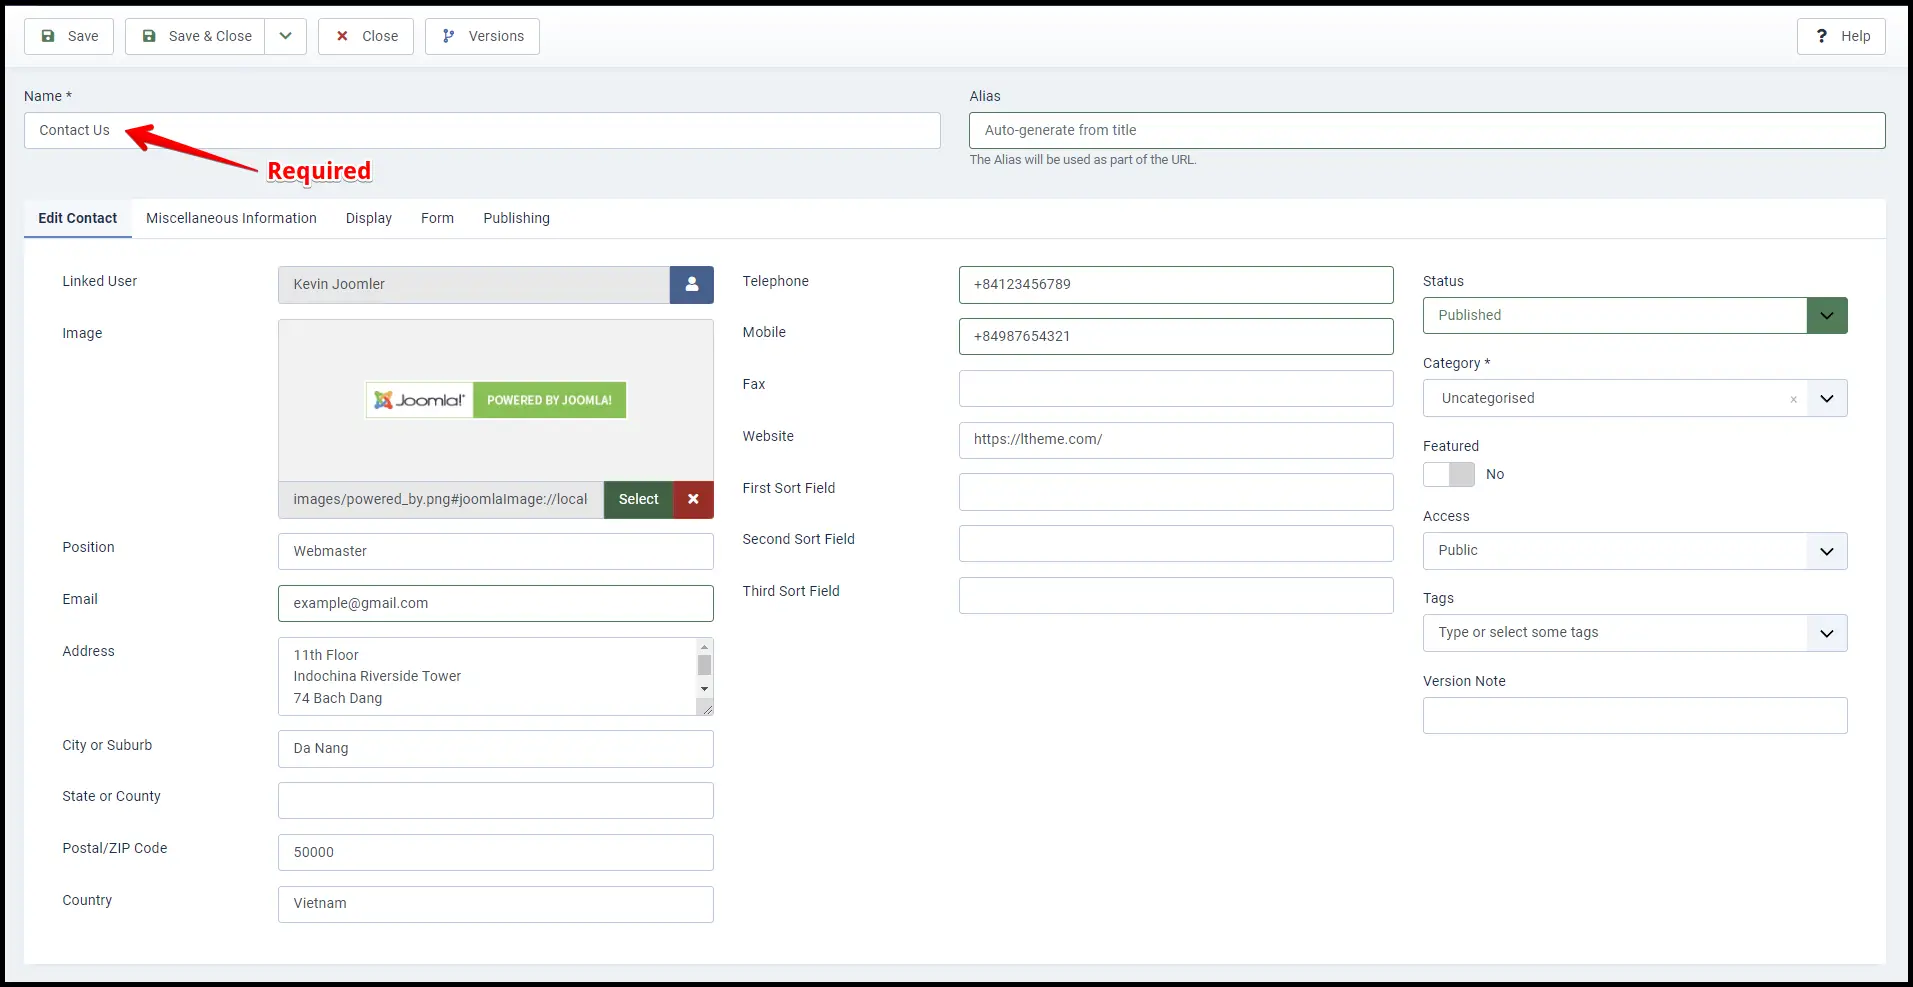
Now fill in the required details for your contact, including image, phone number, website, address, and any other information. Most importantly, make sure to enter a valid email address, as all form submissions will be sent to this email.
You also need to select a user to associate with the contact. This ensures that the contact form is properly linked and can send email notifications. You can use any email address here, not just your personal one.
The additional tabs available (apart from the Edit Contact tab) contain various options and parameters that you can customize based on your requirements, such as display settings and form behavior.
👉 If you are using the latest version, you can also check this Joomla 5 contact form tutorial for updated steps.
👉 Also, explore this guide: 5 Best Free Joomla Templates to enhance your website design.
Once you have completed all the settings, click the Save & Close button at the top left to apply your changes.

Next, we’ll make it visible so that everyone can see it.
Connect the Contact Form with a Menu Item
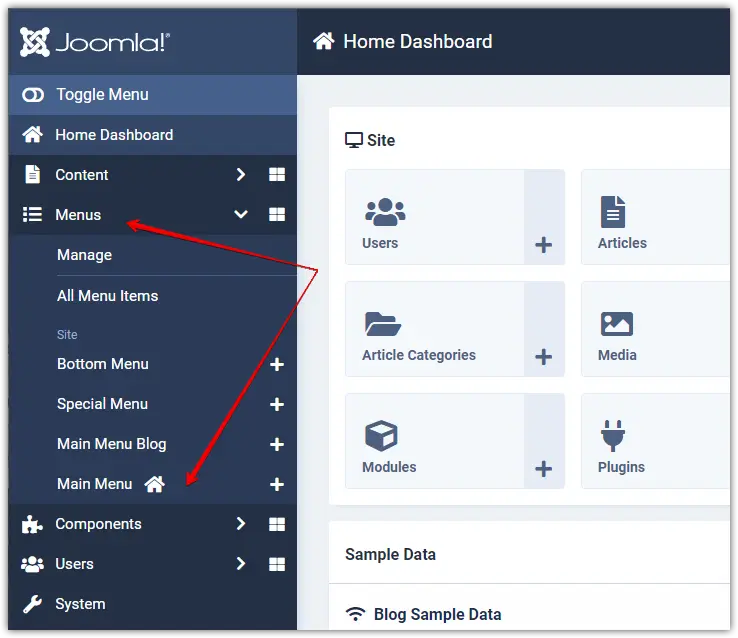
Your contact form must be publicly accessible in order for site visitors to send you feedback. To demonstrate, I’ll link it to my main menu so that everyone can easily access it.
Go to Menus > Main Menu:
To create a menu item for the contact form, click on the New button.

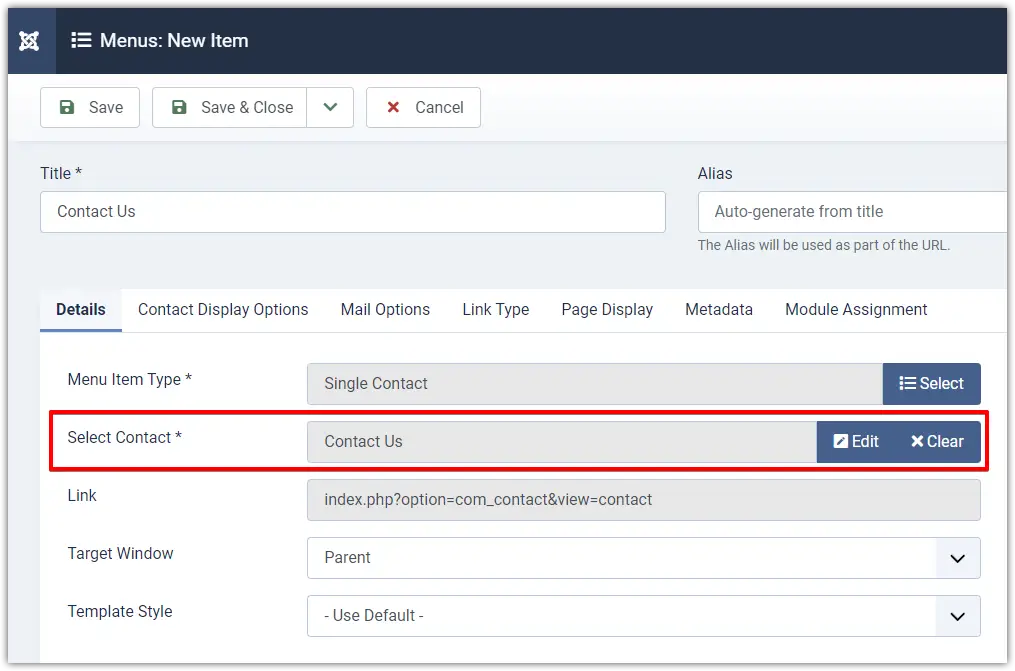
Enter your new menu title. For this example, I am using the name Contact Us:
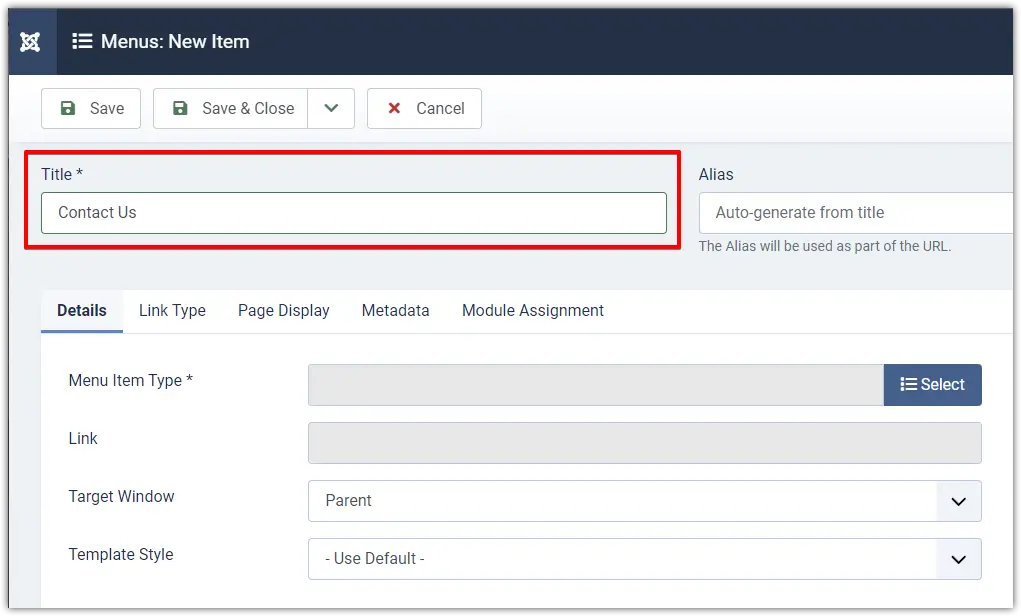
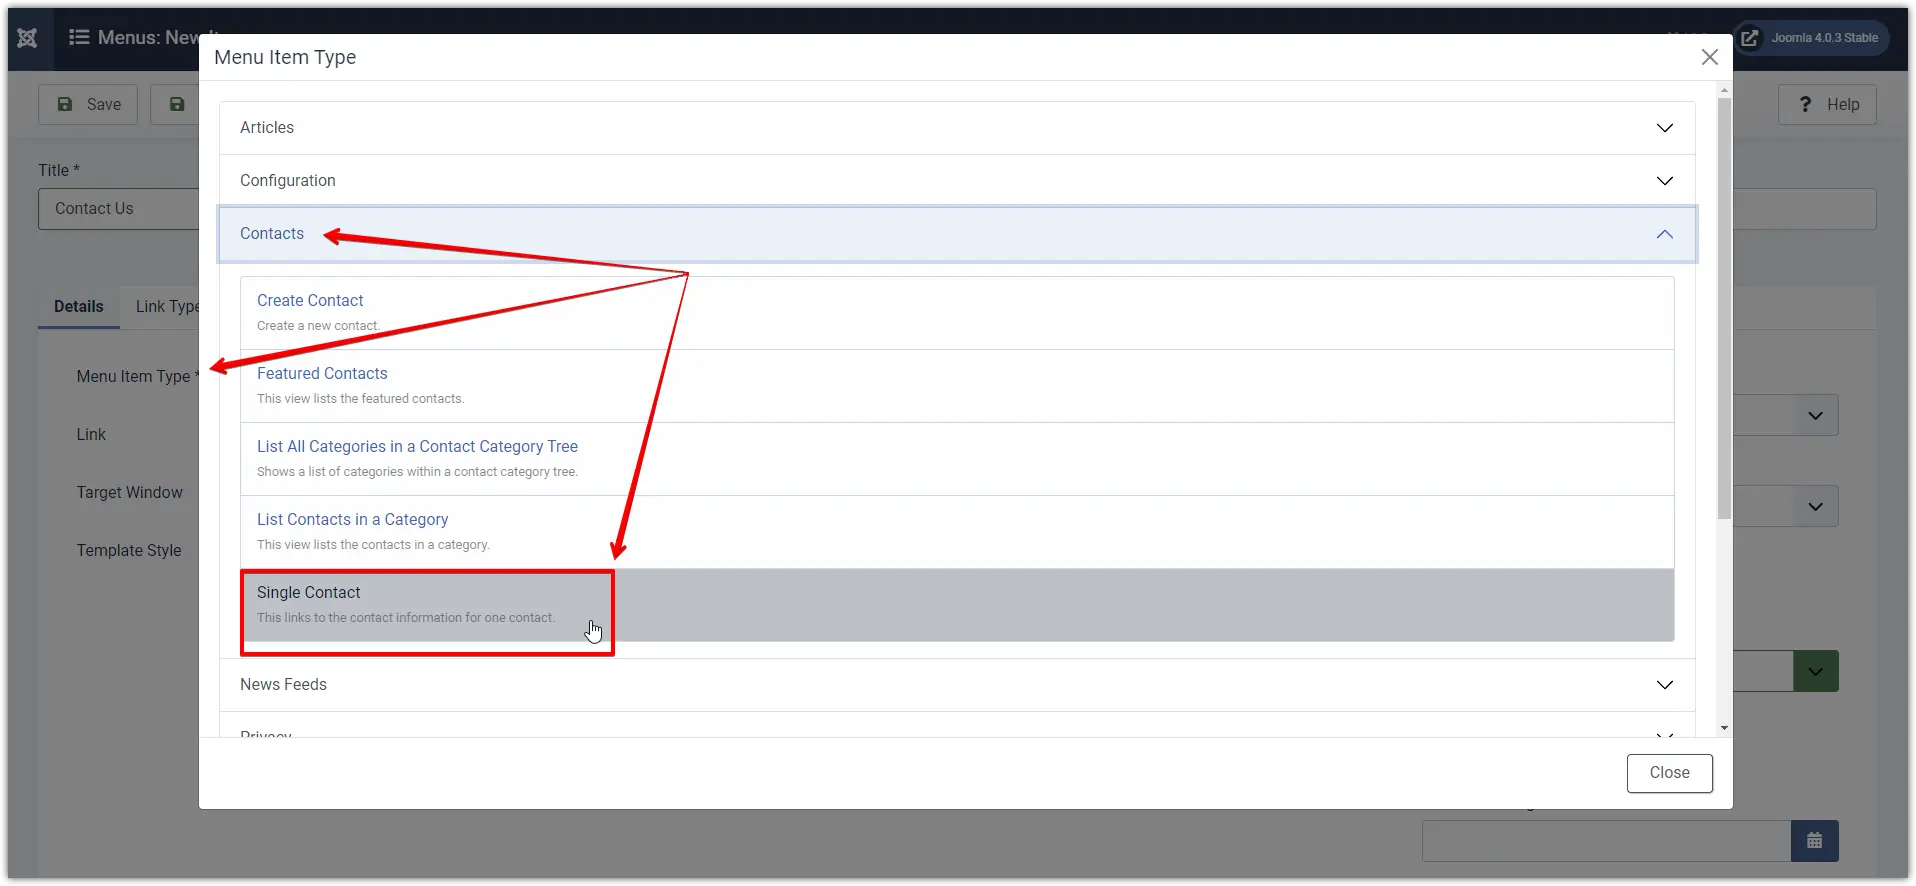
Now, from the Menu Item Type, select Contacts > Single Contact:
In the Select Contact field, select a previously created contact form to assign to the menu item. It is Contact Us in my case:
Click Save & Close to apply the changes. Make sure the menu item status is set to Published.
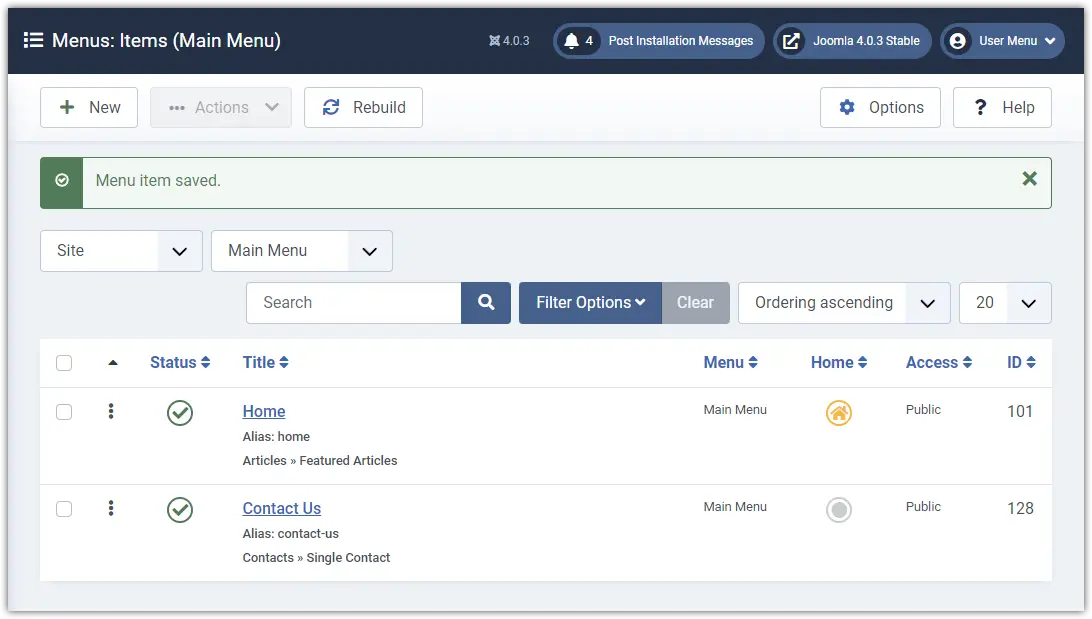 Joomla-4-Contact-Component-Menu-Item-Saved
If everything went well, you should now see a link to your contact page in the main menu on the front end of your website.
Simply click on it and…
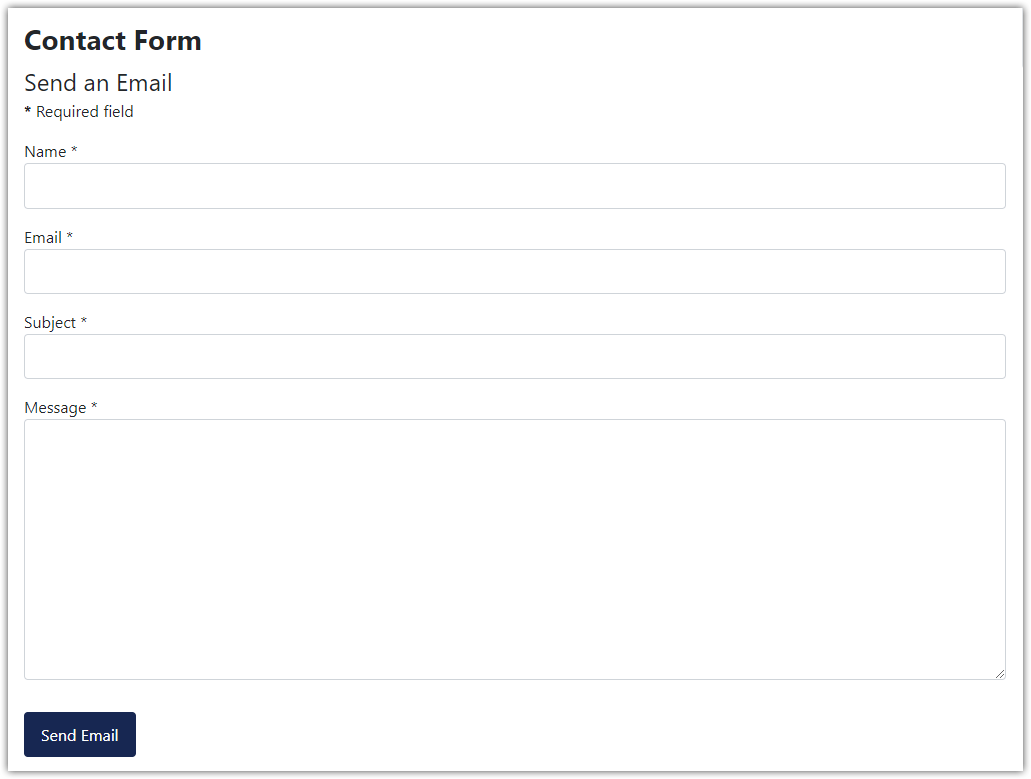
That’s it! 🎉 You have successfully created a basic contact form using Joomla’s built-in contact component.
💡 Tip: Each Joomla user account is linked to a unique email address. This means you can create multiple contact forms for different users on your website. Simply create a new contact and select the desired user in the Linked User field. All messages submitted through that form will be sent to the associated user’s email address.
Summary
In this tutorial, you learned how to create a contact form in Joomla using the default contact component. You also saw how to configure contact details, link users, and manage email communication. This method is simple, beginner-friendly, and works without any extensions.
If you have any questions or face any issues, feel free to leave a comment below—I’ll be happy to help!
👉 Next, you can improve your website by learning how to optimize templates, SEO settings, and performance in Joomla.
I hope you found this guide helpful. If you have any questions or face any issues, feel free to leave a comment below—I’ll be happy to help!
Frequently Asked Questions (FAQ)
How do I create a contact form in Joomla 4?
You can create a contact form using Joomla’s built-in Contact component. Simply create a contact, assign a user, and link it to a menu item to display the form.
Why is my Joomla contact form not sending emails?
This usually happens due to incorrect mail settings. You should configure SMTP settings in Global Configuration and ensure your hosting supports email sending.
Does Joomla contact form store messages in the database?
No, the default Joomla contact form does not store messages in the database. It only sends emails. To store submissions, you need a form extension.
How can I add CAPTCHA to Joomla contact form?
You can enable Google reCAPTCHA from Plugins and select it in Global Configuration under the Default Captcha option.
Which is the best form extension for Joomla?
Popular Joomla form extensions include RSForm, Breezing Forms, and Convert Forms. These provide advanced features like database storage and integrations.
Stay updated with our latest news, special offers, and exclusive updates directly in your inbox.