Joomla is another excellent CMS for creating complex websites. we can install Joomla on the server or localhost. In this tutorial, we will learn how to install Joomla on localhost (XAMPP).
3 ways we are required to install Joomla on localhost?
- Windows 10 or Linux or Mac OS
- WAMP or XAMPP or LAMP server
- Joomla Software Package
How to install Joomla on Localhost
Step 1: Install Server on Localhost
Download the XAMPP server and WAMP server Install or to your system and install the server to your system. You can read our post on How to install XAMPP on Windows 10?

Step 2: Open phpMyAdmin from localhost
In this tutorial, we are using the XAMPP server and using the latest version for better use of Joomla.
For now, we are using xampp-windows-x64-8.1.6-0-VS16-installer, So after successfully installing Open the phpMyAdmin from your browser using the following URL:
localhost/phpmyadmin

Before opening this, you have to start the PHPMyAdmin server and apache server.
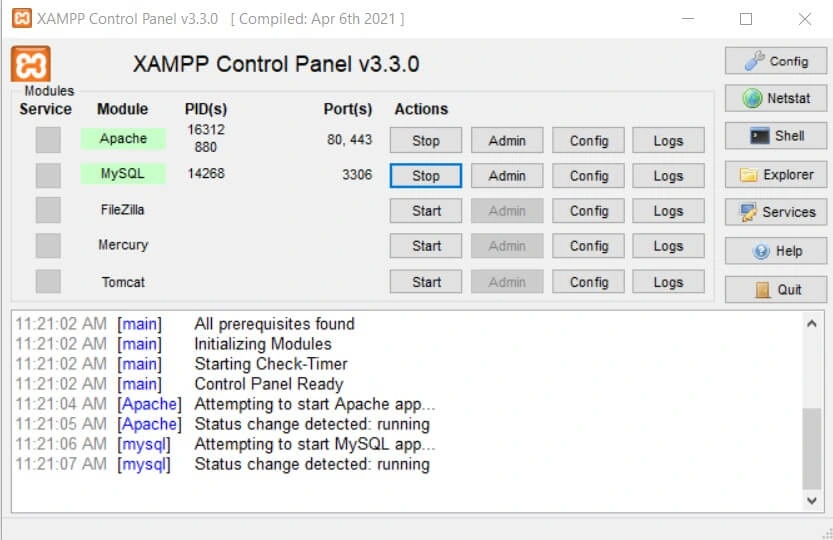
If you are getting an error then you can see our post: How to fix Apache not starting on XAMPP.
Step3: Create Database
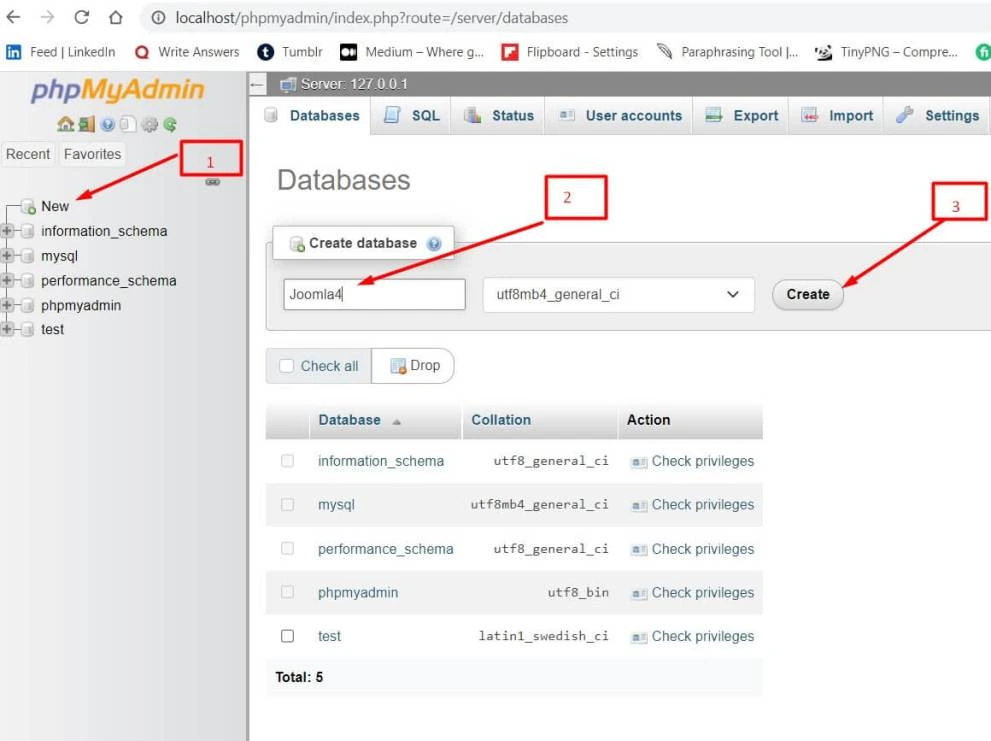
This is an essential element in installing Joomla on localhost.
Let’s See: How to access the Template files in Joomla?
Remember the database name; we’ll need it in step 6.
Step4: Download Joomla
Now, we have to download the Joomla package from Joomla official site as the .zip or .tar.gz file.
Extract all .zip or .tar.gz file.
Step 5: Exact Joomla files in the htdocs directory of XAMPP
Copy all the Joomla files in the htdocs root directory on XAMPP or WWW root directory WAMP and rename them as you want for example I have renamed it as joomla4.
Let See: How to change the default temp folder in Joomla 4?
Step6: Install Joomla
Now let’s time to install Joomla into localhost. Open in the browser address bar localhost/(yourjoomlafoldername). In our case, I renamed as Joomla4 so it will be as below
Localhost/joomla4
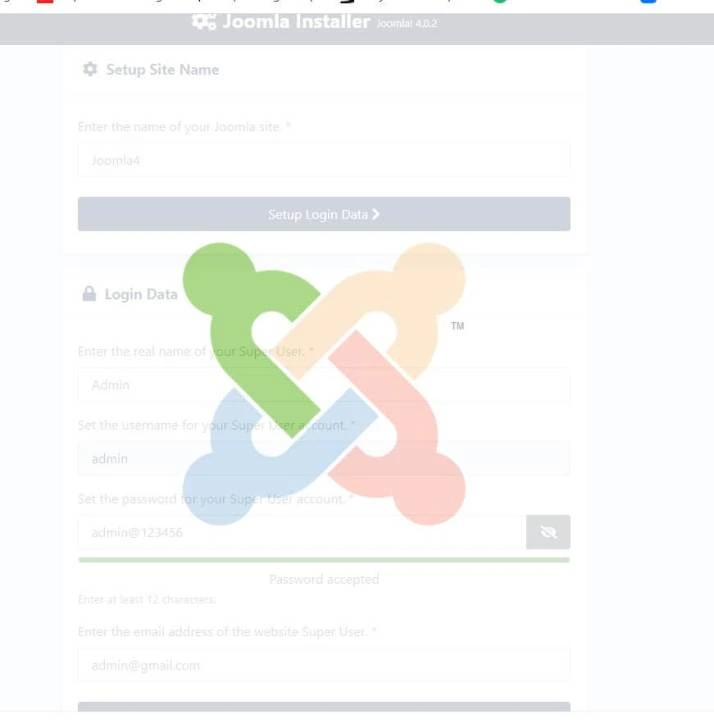
- Enter the site name below the screen –

- Enter the Joomla admin login detail –
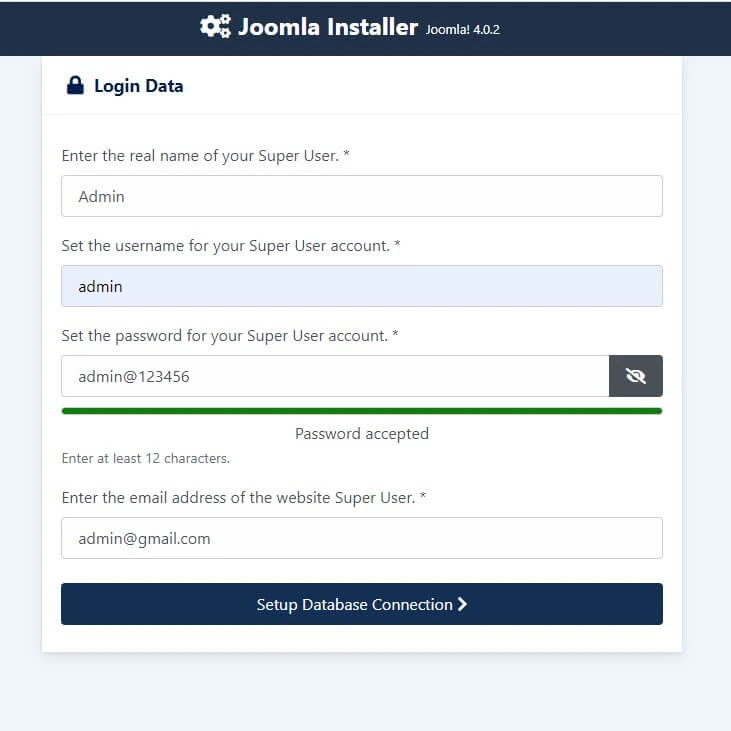
Let See: How to update Joomla to latest version
- Enter the database detail that you have created using phpMyAdmin from Step 3
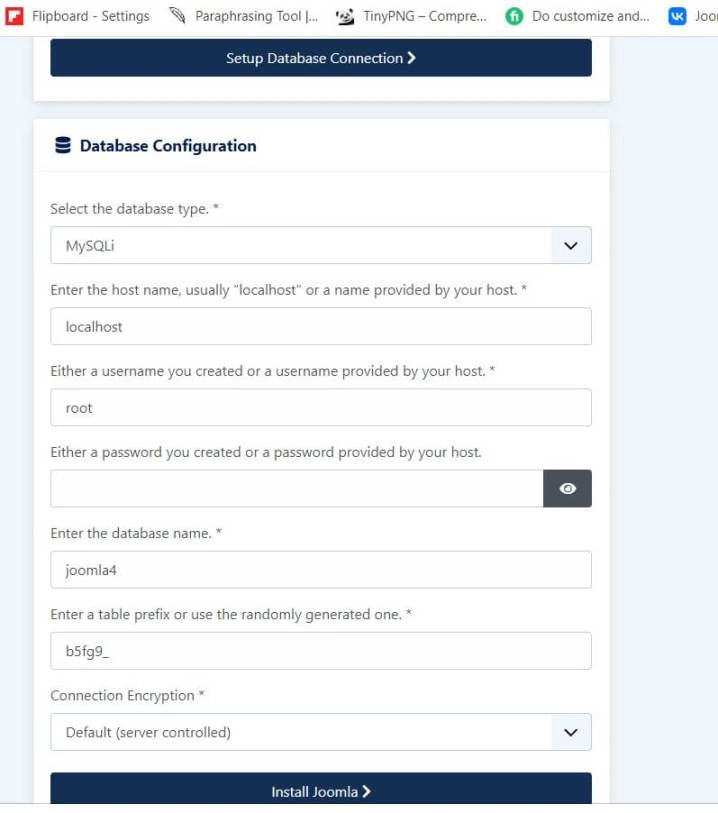
Select database type as MySQLi,
The hostname is localhost
Username is root
The password is blank, I haven’t created any password for root.
- click on Install Joomla to start the installation of Joomla.
- Now Joomla 4 installation has been completed
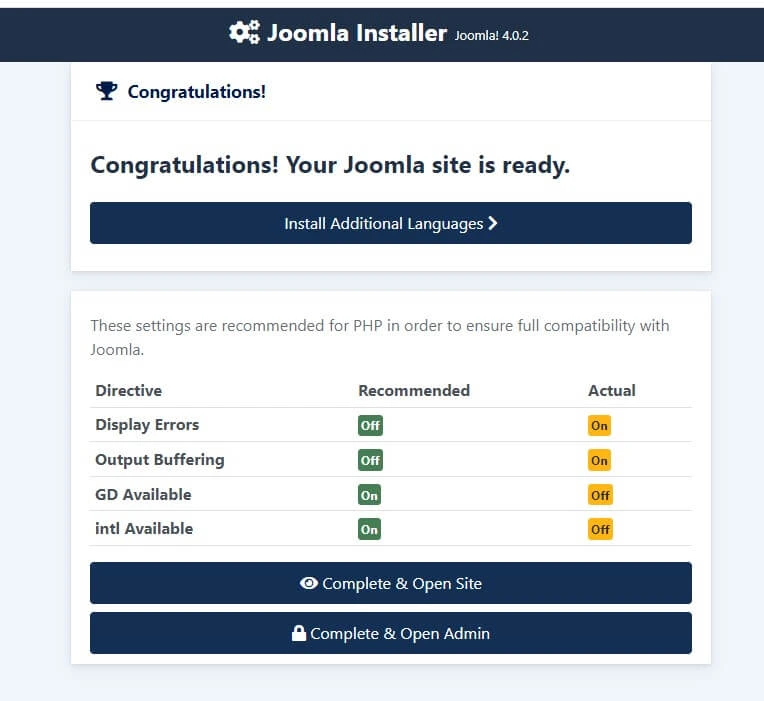
- Remove the Installation folder if you get noticed
- Now you can access the admin panel

- You can login using your username and password which you inserted in the above installation process
- After Login you will get the default admin dashboard

- Default Front-End view Joomla4

