Last Updated on June 6, 2026
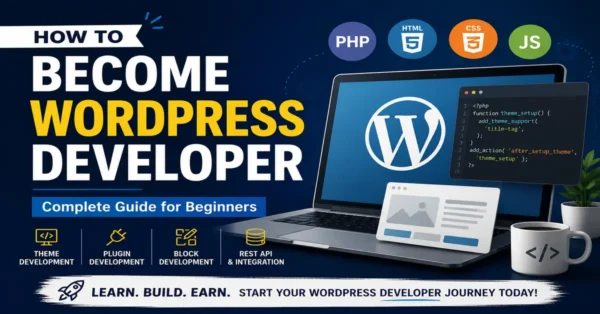
Want to learn how to create a WordPress website in 2026? This comprehensive step-by-step guide will walk you through the entire process, from choosing a domain name and hosting provider to launching a fully functional website. Whether you’re building a personal blog, a business website, a portfolio, a membership platform, or an eCommerce store, this tutorial is designed to help you get started quickly and efficiently.
In the early days of web development, creating a website often required knowledge of HTML, CSS, JavaScript, and server management, or the budget to hire a professional developer. Today, modern Content Management Systems (CMS) such as WordPress and Joomla have transformed the website development process, enabling the creation of professional, responsive, and feature-rich websites with minimal coding. With thousands of themes, plugins, and customization options available, WordPress has become the preferred platform for developers, businesses, and content creators worldwide.
If you are a complete beginner and want a simpler approach, read: How to Create a WordPress Website Without Coding.
What You Need Before Building Your WordPress Website
To successfully start your WordPress website, you only need a few core essentials: a domain name (your website address), dependable hosting (where your website files are stored), and proper WordPress setup.
Among all website-building platforms, WordPress continues to dominate in 2026 because of its SEO-friendly structure, beginner-friendly dashboard, customization flexibility, and massive library of themes and plugins.
If you’re just getting started, understanding the basics first can save you time. That’s why we recommend reading our detailed tutorial on what WordPress is and how it works before moving forward.
For additional official resources, themes, and plugin downloads, you can also visit WordPress.org.
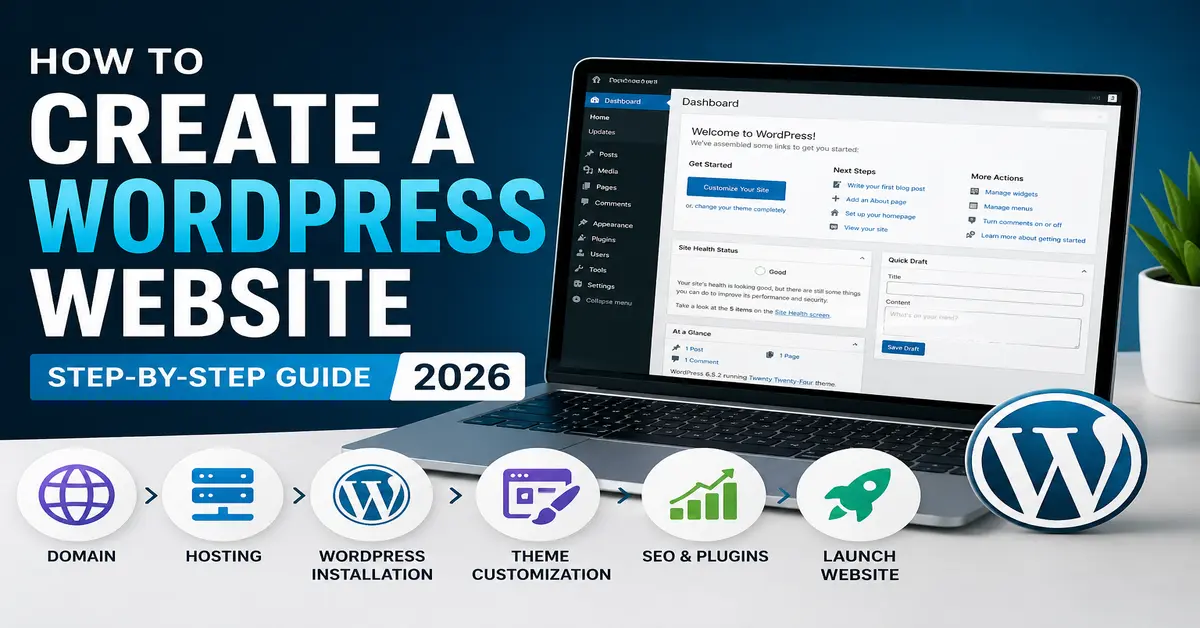
In this complete WordPress tutorial, you’ll learn how to choose the right domain, select the best hosting provider, install WordPress, customize your design, optimize SEO, and launch your website successfully in 2026.
Step-by-Step Guide to Building Your WordPress Website
What Do I Need to Develop a Website?
There are three essential things you need to create your WordPress website successfully:
- Domain Name – This is your website’s address or URL, like facebook.com
- Hosting – This is where your website files and data will be stored
- WordPress Setup Installation – This is the installation process that sets up WordPress on your hosting account
Now, let’s begin with the first step.
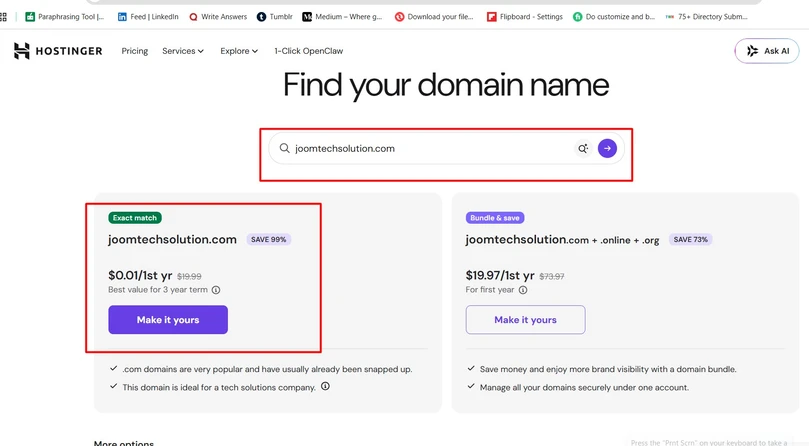
Step 1: Domain Name
The first step is choosing the right domain name for your website. Your domain name should ideally match your blog title, business name, or company brand so that visitors can easily recognize and remember it.
It’s always recommended to choose an SEO-friendly domain name that is simple, relevant, and easy to type. If possible, try to get a .com domain extension because it is the most popular and trusted option worldwide. However, if your preferred domain name is not available, you can also explore other domain extensions.
What is a domain name?
A domain name is the online address of your website. For example, google.com is the domain name of Google. When someone enters your domain name into their browser, your website loads. Since every domain name is unique, selecting the right one is an important step in building your online presence.
Step 2: Web Hosting
One of the most common mistakes beginners make is focusing only on the domain name while ignoring the importance of quality hosting. Choosing the right Web hosting is crucial because hosting directly affects your website’s speed, security, and overall performance.
For a detailed comparison, please check our guide on the Top 5 Best WordPress Hosting.
WordPress officially recommends these three hosting providers:
If you’re still confused and want a personal suggestion, Hostinger is a great option for beginners and business websites. At the same time, Bluehost is also an excellent choice known for speed and support.
Once you’ve purchased your domain and hosting, you’re ready for the next step: installing WordPress.
Step 3: WordPress Installation
Once you’ve purchased your domain and Web hosting, the next step is installing WordPress on your server.
Most modern hosting providers, such as Bluehost, DreamHost, SiteGround, Hostinger, and Cloudways, make launching a WordPress website incredibly easy. In 2026, many hosting plans include automated WordPress setup, guided onboarding, AI-powered website creation tools, and one-click installation features that allow beginners to get online in just a few minutes.
In many cases, WordPress is automatically installed during the hosting account setup process, eliminating the need for any manual configuration. If it isn’t pre-installed, you can quickly install WordPress using the one-click installer available in your hosting dashboard or control panel. Most hosting providers also offer automatic updates, built-in security features, staging environments, and optimized performance settings, making it easier than ever for non-technical users to create and manage a professional website.
If you’d like to learn the complete manual installation process, read our detailed guide here: How to Install WordPress from cPanel.
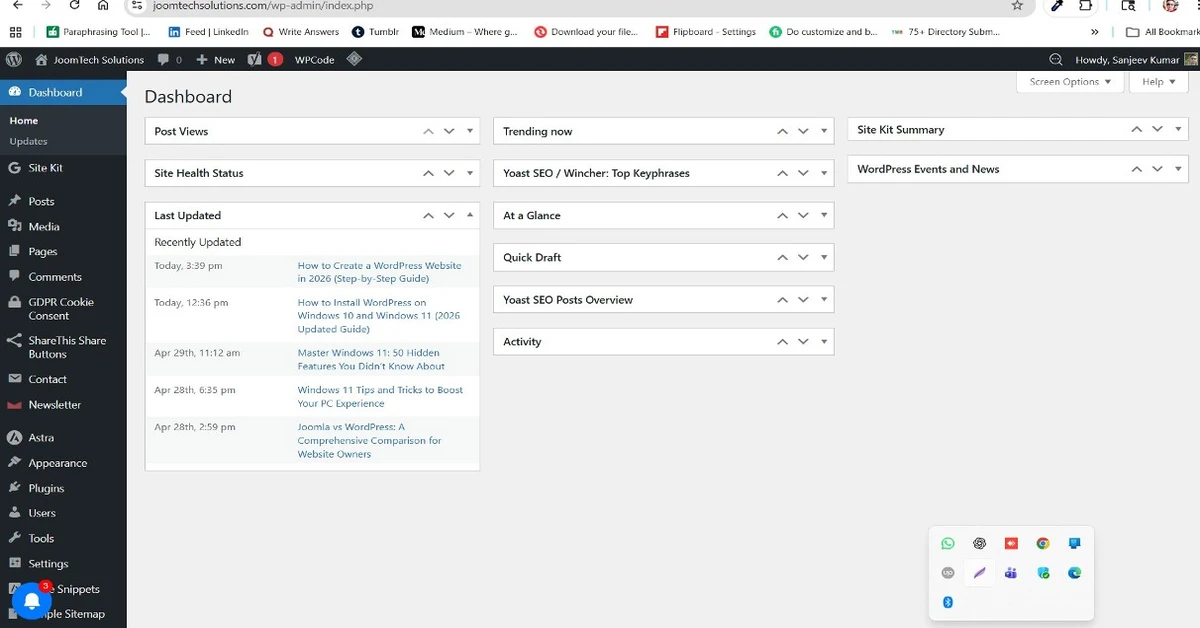
After installation, you can log in to your WordPress dashboard directly from your hosting account by clicking the Login to WordPress button. Alternatively, you can access your WordPress admin dashboard anytime by visiting:
yourdomain.com/wp-admin
Once you log in, you’ll be inside your WordPress dashboard, where you can start customizing your website, installing themes, adding plugins, and publishing content.
Step 4: Select a WordPress Theme
After installing WordPress, the next step is choosing a theme that matches your website’s purpose and design preferences. For this tutorial, I selected the Kadence Theme because it is lightweight, beginner-friendly, highly customizable, and optimized for speed and SEO.
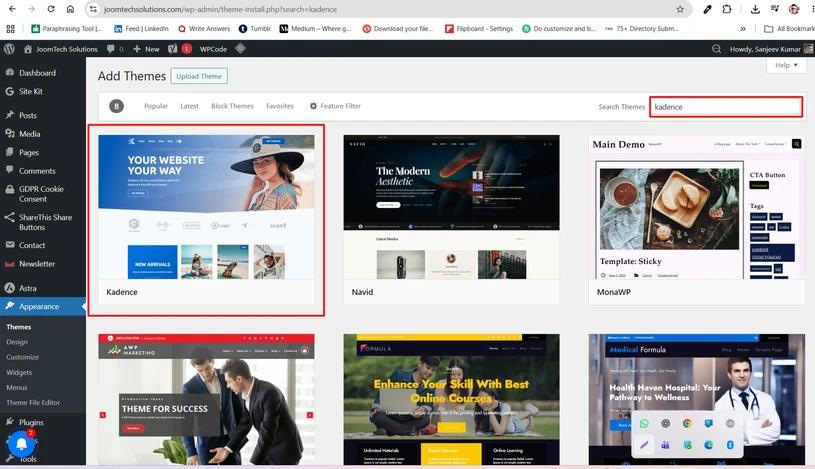
To install the theme, navigate to Appearance → Themes in your WordPress dashboard and click Add New. Search for “Kadence,” then click Install followed by Activate.
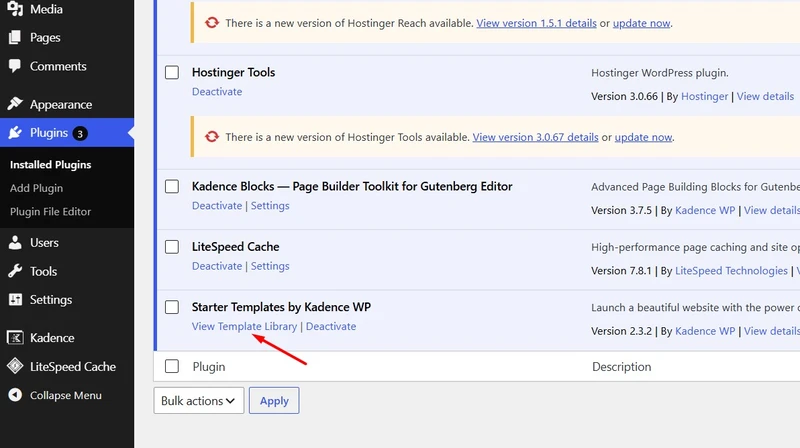
Once the Kadence theme is activated, install the Starter Templates by Kadence WP plugin. This plugin provides professionally designed website templates that can be imported with just a few clicks. For my yoga website, I chose the Yoga Studio starter template, which includes pre-designed pages, layouts, images, and styling tailored for yoga studios, wellness coaches, fitness instructors, and health-related businesses.

Importing the Yoga Studio template automatically creates essential pages such as the Home, About, Classes, and Contact pages, giving you a professionally designed website foundation without needing to build everything from scratch. After the import is complete, you can customize the content, images, colors, and branding to match your business and create a unique online presence.
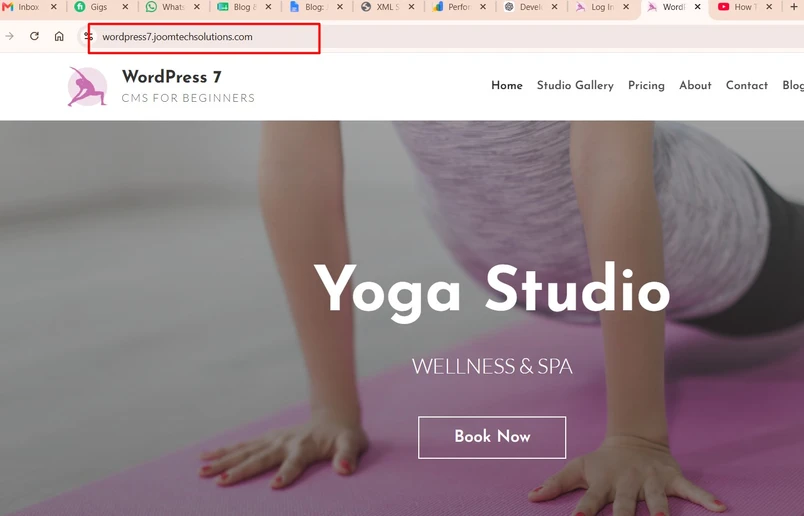
Step 5: Visit your Website Frontend
After installing WordPress and selecting a WordPress theme, now access your website’s actual design and layout publicly.
WordPress website frontend preview displaying the live website design and user interface
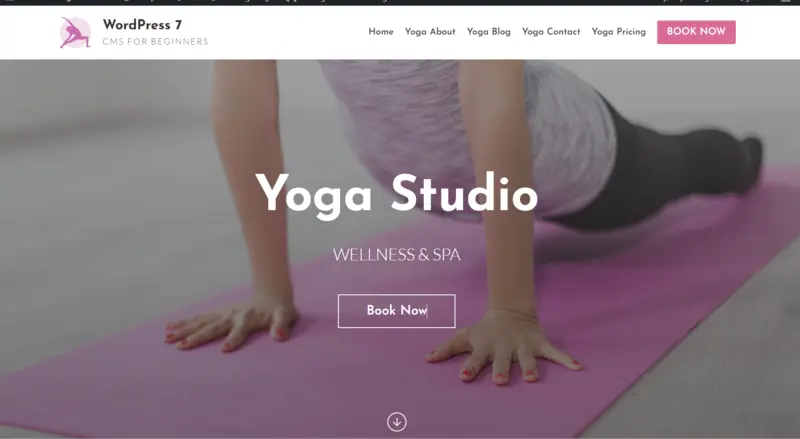
Congratulations! Your WordPress website is now ready to launch.
If you still face any issues during setup or customization, feel free to contact us or leave a comment below—we’re here to help.
Step 6: Customize Your Theme
After importing the Kadence Yoga Starter Template, the next step is to customize the website to match your brand, business, or personal requirements. The imported template contains demo content, images, colors, and text that should be replaced with your own information.
To customize your website’s global design settings, navigate to:
Appearance → Customize
The WordPress Customizer serves as your website’s design control panel. From here, you can modify various aspects of your website and preview changes in real time before publishing them.
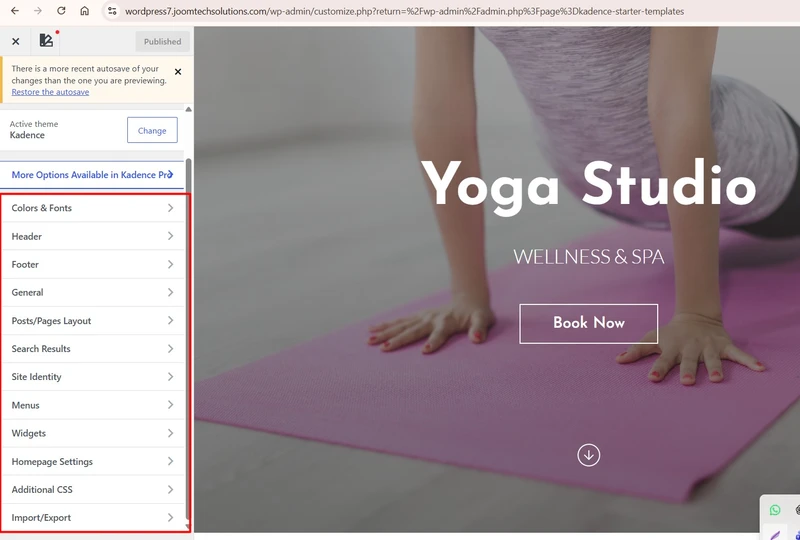
What You Can Customize
- Header: Edit the logo, navigation menu, contact information, and header layout.
- Footer: Update copyright text, widgets, social media links, and footer design.
- Colors & Typography: Change the website’s color scheme, fonts, font sizes, and overall branding.
- Homepage Settings: Configure your homepage and blog page display options.
- Blog Posts: Customize post layouts, featured images, author information, and archive pages.
- Page Layouts: Adjust sidebar settings, page widths, and content layouts.
While the Customizer controls your website’s overall design and appearance, editing individual pages requires a different approach.
Edit Existing Pages
To modify pages such as Home, About Us, Classes, Gallery, Services, or Contact, go to:
Pages → All Pages
Select the page you want to edit and replace the demo content with your own text, images, videos, contact information, and branding. You can also add new sections, rearrange content blocks, and customize the page layout using the WordPress Block Editor.
Create New Blog Posts
If you want to publish articles, news updates, tutorials, or other content, navigate to:
Posts → Add New
Here you can create and publish blog posts, add categories and tags, upload featured images, and optimize your content for search engines. Regularly publishing high-quality content can help improve your website’s visibility and attract more visitors.
Pro Tip: Before launching your website, update all demo content, upload your own images, verify contact details, configure menus, and test your website on mobile devices to ensure a professional user experience.
Final Thoughts
Building a WordPress website is no longer a difficult task reserved only for developers or designers. With the right domain name, reliable Web hosting, proper WordPress installation, a professional theme, and essential SEO plugins, anyone can create a powerful website for business, blogging, eCommerce, or personal branding.
WordPress offers flexibility, user-friendly controls, and thousands of customization options, making it one of the best website-building platforms available today. Whether you are a beginner or an advanced user, following the right steps can help you launch your website quickly and successfully.
The key is to start with the right foundation, choose quality tools, and continue optimizing your website for performance, design, and SEO growth.
Frequently Asked Questions (FAQs)
Which hosting is best for WordPress beginners?
What is the best SEO plugin for WordPress?
How long does it take to build a WordPress website?
Can I create a WordPress website without coding knowledge?
How much does it cost to create a WordPress website?
Stay updated with our latest news, special offers, and exclusive updates directly in your inbox.