You will learn how to install WordPress using cPanel in this tutorial. if you want to learn about How to install WordPress in localhost or XAMPP, you should read our recent post.
WordPress (WP) is a popular content management system (CMS). Its ease of use, numerous themes and plugins, and strong community support have propelled it to the top of the world’s solutions list. WordPress is used for a wide range of purposes, from simple blogs to complex websites.
There are 2 ways to install any CMS (Application) from Cpanel-
- Manually installing by the local computer
- Direct by cPanel Apps Installer(Softaculous)
Manually Installing WordPress in cPanel
We can install WordPress manually as well as automatically from the server (cPanel). So in this tutorial, we are talking about Manually Installing WordPress by cPanel.
What is cPanel?
cPanel is a web-based control panel. cPanel is the interface through which you manage your web hosting account. Automated WordPress installation script installers, such as Softaculous and Fantastico, are included in many control panels. WordPress must be manually installed on cPanel if yours does not already have it installed.
WordPress can be downloaded here.
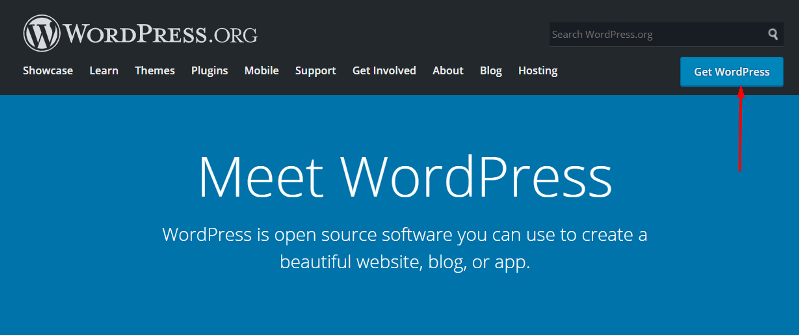
Download the latest version from the official website of WordPress CMS. So just download the zip file and save it to your computer desktop.
After downloading the zip file, we have 2 choices one is to first extract the zip file from a local computer and then upload it to the server by Cpanel file manager or by FTP., and the second option is that upload a direct zip file by cPanel. So I am using the second option which is the fast way.
Upload the WordPress Installation Setup to the server
- Log in to your cPanel. You can access it by going to your domain name.com/cpanel.
- Log in with your user credentials.
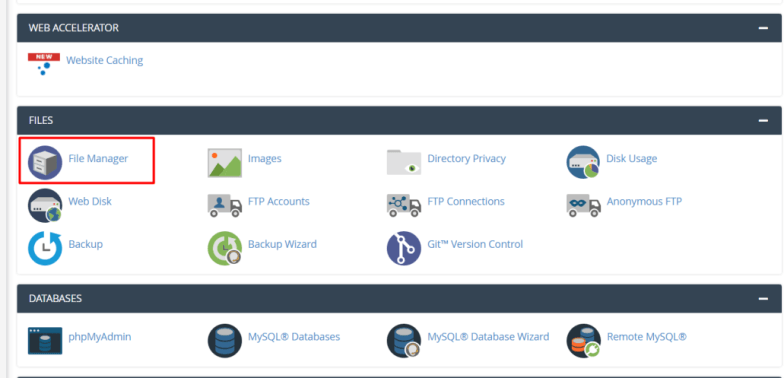
- Find and launch the File Manager tool.
- Navigate to the public HTML directory. The public HTML directory is your webroot, and it is where you will store all of your websites.
- You must choose a location for your WordPress site. There are two choices:
- In your domain’s root directory (for example, your domain name.com/)
Upload the WordPress folder’s contents, but not the folder itself. Following the upload, all WP files and subfolders should be located in public HTML.
- In a domain subfolder (for example, your domain name.com/second-site).
Upload the entire WordPress directory. When you’re finished, rename the WordPress folder to whatever you want (e.g., MySecondBlog).
- To upload files, you have to click on the Upload button as the following screenshot.
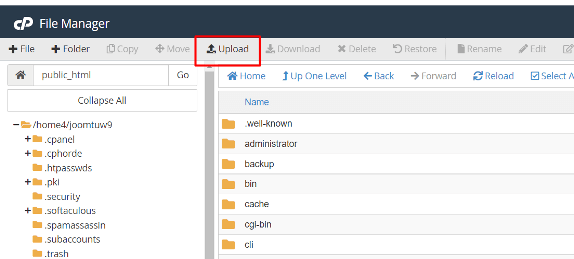
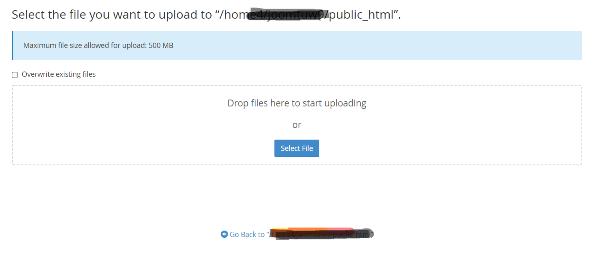
After clicking on the Upload button new tab will open like the below screenshot so there you can upload files very fast.
- Once you’ve extracted the WordPress installation archive, remove the zip file from your web server. Delete the zip file by right-clicking it.
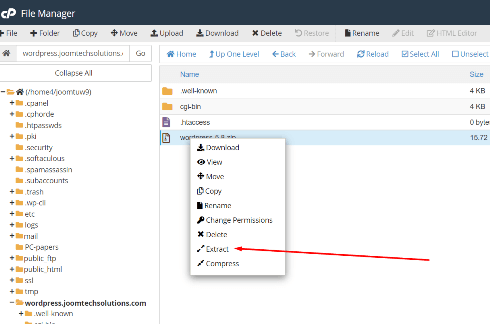
The files should be extracted into a WordPress folder. That folder should contain all of the necessary WordPress folders and files. You can start the WordPress installation right now by going to
your domain-name.com/wordpress(second-site).
Note: This is in the second case when you want to install it for the second site. And if you want to install it in the root folder then you need to move the extracted file into the root folder.
Every dynamic website (Application) needs a database, So we are using MySQL.
However, before you begin the installation process, you will need the following:
- Create MySQL Database
- Database-Username and Password
- Database-Host (localhost) mostly
- Database Table Prefix (prefix_tablename).
- A Unique Phrase and Salt Key.
Create a MySQL database and a database user in MySQL Databases.
Click on the MySQL Database in cPanel to get started. This tool can be found under the Database category.

Create a MySQL database
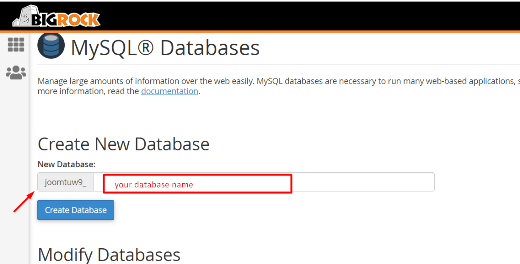
- The first step is to create a Database. Enter your database name, It will be prefixed with the name of your hosting account.
- Note down the database name in a text file. You will need it later.
- Click Create Database button to create a database
Create Database User (MySQL Users)
To Create MySQL(database) user follow the following steps –
- Enter your database username.
- Enter password. It should be a combination of alphanumeric characters and special characters, So it will be secure from hackers. There is a password generator button to generate a critical password that will be very strong.
- Below the password input field, there is a password strength checker, so it should be green if your password is strong.
- Note down the password as well in a file
- Click Create User Button to create a user

Add a User to the Database
The newly created user does not have database access.
- Below of Add New User, you can find Add User To Database section of the page.
- Select your newly created user from the User drop-down menu.
- From the Database drop-down menu, select your newly created database and click Add

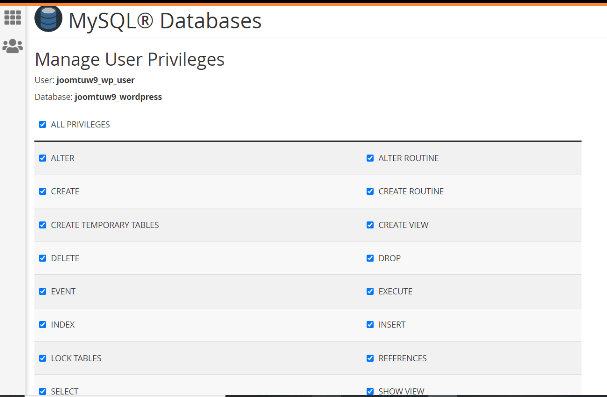
Add a User to the Database - The next step would be to assign database permissions. Select the All Privileges checkbox for the initial database user.
- Check the checkbox All Privileges and click on Make Changes to assign privileges to the user.

check-all-privileges - To double-check, go back and scroll down to see the most recent databases. A database should be created, with a privileged user assigned to it.
After that, go back to your domain-name.com/wordpress or subdomain like wordpress.joomtechsolutions.com where you want to install wordpress and finish the installation.
Run the WordPress Installer
Just open your URL on the browser like
- If you are installing in the root folder: Your-domain-name.com [joomtechsolutions.com]
- If you are installing subdomain: Your-subdomain-name.com[wordpress.joomtechsolutions.com]
- Or you just installing the inner folder (wordpress) of your website:
- Your-domain-name.com/wordpress
When you open the URL you will get the first step installation window which will be the Language selection popup. So next steps will be the same as our previous post. So just below post for further steps: How to Install WordPress on Windows [XAMPP]

