Last Updated on August 10, 2026
Joomla 6 includes a powerful Web Services API that allows applications, mobile apps, scripts, and other services to communicate with your Joomla website using HTTP requests. However, before building an application around the API, you need an easy way to test your endpoints.
Postman is one of the most useful tools for this job. It lets you send GET, POST, PATCH, and DELETE requests, add authentication headers, inspect JSON responses, and troubleshoot API errors without writing PHP or JavaScript code first.
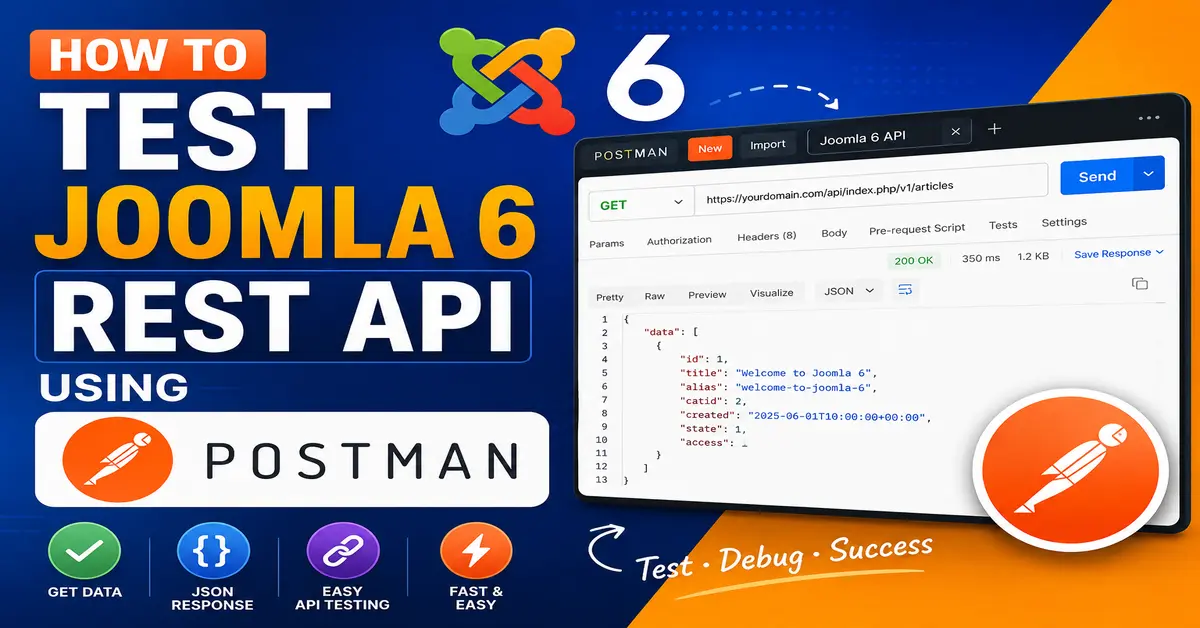
In this tutorial, we will learn how to test Joomla 6 REST API using Postman step by step. We will configure API authentication, send a request to the Joomla Articles API, understand the response, and test additional API operations.
If you’re new to Joomla 6 Web Services, it’s helpful to understand the basics of how the REST API works before testing requests in Postman. Start with our guide to Joomla 6 REST API to learn about API endpoints, authentication, and how Joomla communicates with external applications.
What Is the Joomla 6 REST API?
The Joomla Web Services API provides HTTP endpoints that allow external applications to interact with Joomla. For example, you can use the API to retrieve articles, create new articles, update existing content, delete records, and work with other supported Joomla resources.
A typical Joomla API URL looks like this:
https://example.com/api/index.php/v1/Here, replace example.com with your own Joomla website domain.
For example, the Joomla Articles endpoint is:
https://example.com/api/index.php/v1/content/articlesThe Joomla API documentation uses the /api/index.php/v1 path for the versioned Web Services API and documents core endpoints such as Articles, Users, Categories, Newsfeeds, and other resources.
If you are new to Joomla 6 REST API, it is a good idea to understand how Joomla Web Services work before testing individual API requests. Our Joomla 6 Web Services: Complete Beginner’s Guide explains the basic concepts, API endpoints, authentication, and how Joomla can communicate with external applications.
Why Use Postman to Test Joomla 6 API?
You could test some API URLs directly in a browser, but Postman gives you much more control over the request.
With Postman, you can easily:
- Choose the HTTP method.
- Add Joomla API authentication.
- Set request headers.
- Send JSON request data.
- View HTTP status codes.
- Inspect JSON responses.
- Save API requests for later.
- Create collections for different Joomla API endpoints.
- Test GET, POST, PATCH, and DELETE requests.
- Debug authentication and permission problems.
This makes Postman particularly useful when you are developing a Joomla extension, mobile application, frontend application, automation tool, or custom integration.
What You Need Before Testing Joomla 6 REST API
Before opening Postman, make sure you have the following:
- A working Joomla 6 website.
- Access to the Joomla Administrator.
- A Joomla user account with the required API permissions.
- A Joomla API token.
- Postman installed on your computer or access to the Postman web application.
- A few Joomla articles for testing the GET request.
For a live website, always use HTTPS when sending authenticated API requests.
Step 1: Create or Access Your Joomla API Token
Joomla’s Web Services API supports token-based authentication. The API token is associated with a Joomla user and is used to authenticate API requests.
Log in to your Joomla Administrator and open the profile of the user you want to use for API testing.
Look for the Joomla API Token section in the user’s profile.
The exact permissions available to the user matter. Authentication only proves who is making the request; Joomla permissions still determine what that user can do through a particular endpoint.
For initial testing, using a dedicated API user with only the permissions required for your integration is a better practice than sharing credentials or using a personal account unnecessarily.
Before testing API requests in Postman, you need to understand how Joomla authenticates API users. If you’re not familiar with API token authentication, read our guide on Joomla 6 API Authentication with API Tokens (Step-by-Step) for a detailed explanation of creating and using API tokens in Joomla 6.
Keep Your API Token Secret
Your API token should be treated like a password.
Never publish your token in a blog post, GitHub repository, JavaScript file, screenshot, or public API collection.
In Postman, use variables for sensitive values when possible. This makes it easier to switch between local, staging, and production environments without copying secrets into every request.
Step 2: Open Postman
Open Postman and create a new HTTP request.
You can create a collection such as:
Joomla 6 REST APIInside that collection, you can later create separate requests for:
- Get Articles
- Get Single Article
- Create Article
- Update Article
- Delete Article
- Get Categories
Organizing your requests this way makes API development much easier as your project grows.
Step 3: Test a Joomla 6 GET Request
Let’s start with the simplest API request: retrieving Joomla articles.
In Postman, select:
GETThen enter:
https://example.com/api/index.php/v1/content/articlesReplace example.com with your Joomla website domain.
The complete request should look similar to:
GET https://example.com/api/index.php/v1/content/articlesAdd the Joomla API Authentication Header
Joomla’s Web Services examples use the X-Joomla-Token request header for token authentication.
In Postman’s Headers tab, add:
| Key | Value |
|---|---|
X-Joomla-Token | YOUR_API_TOKEN |
Accept | application/vnd.api+json |
Content-Type | application/json |
Replace YOUR_API_TOKEN with your actual Joomla API token.
Joomla’s current Web Services documentation shows the X-Joomla-Token header together with JSON request and response headers for API requests.
Authentication is one of the most important parts of working with the Joomla API. Joomla 6 supports API token authentication, which allows an external application to securely identify the Joomla user making the request. If you want to understand this process in more detail, see our guide on Joomla 6 API authentication with API tokens.
Send the GET Request
Click the Send button in Postman.
If authentication, permissions, and the endpoint are configured correctly, Joomla should return a JSON response containing the requested articles.
You may see a response containing article information such as IDs, titles, aliases, category information, publishing information, and other fields provided by the endpoint.
The exact response can vary depending on your Joomla version, permissions, installed extensions, and the request parameters.
Step 4: Understand the Joomla API Response
After sending the request, look at the response section at the bottom of Postman.
Pay attention to three things:
- Status code
- Response body
- Response headers
HTTP 200 OK
A successful GET request normally returns an HTTP success response such as 200 OK.
This means Joomla successfully processed the request and returned the requested resource.
JSON Response
The response body will normally be displayed as JSON in Postman’s response viewer.
This is useful because you can immediately see what data your application will receive from Joomla.
Step 5: Get a Single Joomla Article
After successfully retrieving the article list, test an endpoint for a single article.
Suppose the article ID is 25.
Use:
GET https://example.com/api/index.php/v1/content/articles/25Keep the same authentication and JSON headers.
Click Send.
Joomla should return the information for that specific article if the article exists and the authenticated user has access to it.
This is an important test because applications frequently need to retrieve one specific content item instead of downloading the entire article list.
Step 6: Test Filtering in Postman
Once your basic GET request works, you can test query parameters.
For example, Joomla’s API supports filtering on supported endpoints. The exact filter names depend on the endpoint.
A request can look similar to:
GET https://example.com/api/index.php/v1/content/articles?filter[category]=2In Postman, you can also add query parameters from the Params tab instead of manually typing them into the URL.
| Key | Value |
|---|---|
filter[category] | 2 |
This makes it easier to experiment with filters, pagination, and other supported query parameters.
Step 7: Create a Joomla Article Using Postman
After testing GET requests, you can test a POST request to create an article.
In Postman, change the method to:
POSTUse this endpoint:
https://example.com/api/index.php/v1/content/articlesSet the Request Headers
Use the same authentication header:
X-Joomla-Token: YOUR_API_TOKENAlso include:
Accept: application/vnd.api+json

Content-Type: application/json
Add JSON Request Data
Open Postman’s Body tab and select:
raw > JSON
You can then provide article data similar to:
{
  "title": "My First API Article",
  "alias": "my-first-api-article",
  "catid": 2,
  "state": 1,
  "featured": 0,
  "language": "*",
  "access": 1,
  "introtext": "<p>This article was created using Joomla 6 API.</p>",
  "fulltext": "<p>This is the full article content.</p>"
}
Make sure the category ID exists on your website and that the API user has permission to create articles.
Click Send.
If the request is accepted, Joomla should return a successful response containing information about the newly created article.
Joomla’s Web Services documentation provides the same general Articles API route and shows POST requests using JSON data together with the Joomla token header.
Step 8: Update an Article with PATCH
PATCH is useful when you want to modify an existing article.
Suppose the article ID is 25.
Use:
PATCH https://example.com/api/index.php/v1/content/articles/25Add the same authentication and JSON headers.
Then select:
Body > raw > JSON
For example:
{

"id": 25,
"title": "Updated Joomla 6 API Article",
"introtext": "This article title was updated using the Joomla API."

}
Send the request and inspect the response.
Joomla’s Web Services documentation specifically demonstrates PATCH for modifying an existing article.
Before working with the API in a production project, it’s a good idea to review the official Joomla Web Services documentation. It explains how Joomla’s Web Services API works and provides information about API endpoints, HTTP methods, authentication, and request formats.
Step 9: Delete an Article Using Postman
DELETE requests should be tested carefully because they can permanently remove content.
For example:
DELETE https://example.com/api/index.php/v1/content/articles/25Keep the X-Joomla-Token header and send the request.
Only perform this test on a test article or development website unless you are completely sure you want to delete the selected article.
Joomla documents DELETE as one of the supported HTTP methods for its core Articles API operations.
Joomla provides detailed documentation for developers who want to work with its Web Services API. The Joomla Web Services API documentation is a useful reference when you need to check available API resources and understand how different requests should be structured.
Common Joomla 6 REST API Errors in Postman
When testing an API for the first time, it is normal to encounter errors. The HTTP status code usually gives you the first clue about what went wrong.
401 Unauthorized
A 401 Unauthorized response usually indicates an authentication problem.
Check:
- Whether the API token is correct.
- Whether the
X-Joomla-Tokenheader is present. - Whether the token belongs to the intended Joomla user.
- Whether the API authentication configuration is working.
403 Forbidden
A 403 Forbidden response generally means Joomla has identified the request but the authenticated user is not allowed to perform the requested action.
For example, your token may authenticate successfully but the user may not have permission to create, edit, or delete an article.
Check the Joomla user’s permissions and the permissions assigned to the relevant content.
404 Not Found
A 404 Not Found response can occur when the endpoint URL is incorrect or the requested resource does not exist.
Check that you are using the correct API base path:
/api/index.php/v1/Then verify the endpoint and resource ID.
400 Bad Request
A 400 Bad Request response often means that the request data is invalid or incomplete.
For POST and PATCH requests, check the JSON body carefully and make sure your field names and values are valid for the endpoint.
How to Troubleshoot Joomla API Requests in Postman
If your request is failing, don’t immediately change several settings at once. Check the request systematically.
- Verify the Joomla website URL.
- Verify the API path.
- Check the HTTP method.
- Check the API token.
- Check the
X-Joomla-Tokenheader. - Check the
Acceptheader. - Check the
Content-Typeheader. - Check the JSON body.
- Check the Joomla user’s permissions.
- Read the response body for additional error information.
This simple checklist can save a lot of time when debugging API integrations.
Use Postman Variables for Joomla API Testing
If you are testing multiple Joomla websites, Postman variables can make your workflow much easier.
For example, create a variable called:
joomla_base_urlSet its value to:
https://example.comYou can then use:
{{joomla_base_url}}/api/index.php/v1/content/articlesYou can also create a variable for your API token, but make sure sensitive values are stored securely and are not accidentally shared with a collection or exported environment.
Postman has its own Learning Center with documentation and tutorials covering requests, collections, environments, variables, authentication, and API testing. It can be useful if you’re still learning how to work with API tools.
Create a Joomla 6 API Postman Collection
If you are learning Joomla REST API development, creating a Postman collection is a good idea.
Your collection could contain:
- 01 – Get Articles
- 02 – Get Single Article
- 03 – Filter Articles
- 04 – Create Article
- 05 – Update Article
- 06 – Delete Article
- 07 – Get Categories
Once these requests are working, you have a reusable test environment for your Joomla API development.
Joomla 6 REST API Testing Best Practices
Keep these practices in mind when testing or developing a Joomla API integration:
- Use HTTPS for authenticated requests.
- Never publish API tokens.
- Use a dedicated API user where practical.
- Give API users only the permissions they need.
- Test destructive requests such as DELETE carefully.
- Use a staging website for development whenever possible.
- Store reusable URLs in Postman variables.
- Keep your API requests organized in collections.
- Check HTTP status codes as well as response bodies.
- Test authentication before debugging your request body.
Joomla 6 REST API Methods You Can Test
Once you understand the basic Postman workflow, you can test the main HTTP methods used by Joomla’s Web Services API.
| Method | Typical Use |
|---|---|
| GET | Retrieve articles or other resources |
| POST | Create a new resource |
| PATCH | Update an existing resource |
| DELETE | Remove an existing resource |
Joomla’s Web Services documentation demonstrates these methods with the core Articles API, making Articles a useful starting point for learning how the Joomla API works.
When you encounter an unfamiliar Joomla feature or API behavior, the official Joomla Documentation is a useful reference. It contains developer and user documentation that can help you understand Joomla’s architecture and available features.
Frequently Asked Questions
How do I test Joomla 6 REST API in Postman?
Open Postman, create a request using the Joomla API endpoint, add your Joomla API token in the X-Joomla-Token header, set the appropriate JSON headers, and click Send. Start with a GET request to the Articles endpoint before testing POST, PATCH, or DELETE.
What is the Joomla REST API URL?
The Joomla Web Services API commonly uses the versioned base path /api/index.php/v1/. For example, the core Articles endpoint is /api/index.php/v1/content/articles.
How do I authenticate Joomla API requests in Postman?
Joomla supports token-based API authentication. For the core Web Services examples, provide the API token using the X-Joomla-Token request header and make sure the Joomla user has the required permissions.
Why am I getting a 401 error in Joomla API?
A 401 response usually indicates that Joomla could not authenticate the request. Check the API token, the X-Joomla-Token header, the user associated with the token, and your Joomla API authentication configuration.
Can I create Joomla articles using Postman?
Yes. You can send a POST request to the Joomla Articles API endpoint with the required JSON article data and an authenticated API token. The API user must have permission to create articles.
Conclusion
Learning how to test Joomla 6 REST API using Postman is one of the easiest ways to understand how Joomla Web Services work before you start building a real integration.
Start with a simple GET request to retrieve articles. Once authentication and the basic endpoint are working, move on to retrieving individual articles, filtering data, creating articles with POST, updating articles with PATCH, and carefully testing DELETE.
Postman gives you a simple visual environment for testing each request and examining the response. Once your requests work correctly in Postman, you can use the same API concepts in PHP, JavaScript, mobile applications, custom Joomla extensions, or other software.
If you are learning Joomla 6 REST API development step by step, testing with Postman is an important foundation before moving on to building your own Joomla API integrations.
Stay updated with our latest news, special offers, and exclusive updates directly in your inbox.