The template is a very important part of any website and it controls the layout on the front-end. if you have a Joomla website and want to create your Joomla template with your design, then you should learn how to create a template in Joomla step by step.
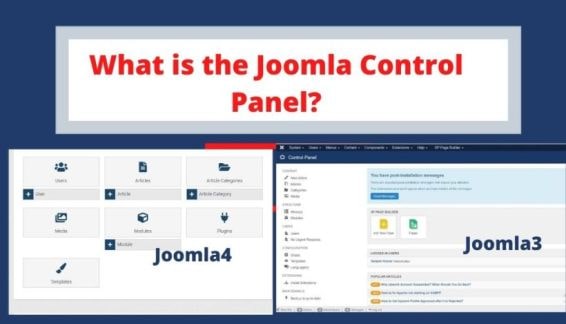
What is the Joomla Template?
Every website needs a beautiful design or layout to attract viewers, so viewers like and impress and come back again to read its content.
“Template is a set of Web Pages that content HTML, CSS, Bootstrap, and JavaScript.”
A template plays a vital role in a website, a perfect template can get the attention of people and engage them.
All type of CMS and frameworks contains their own templates. For now, we are talking about Joomla Template. By default, Joomla contains 4 templates 2 for front-end and 2 for back-end as below –
Let’s See: How do I install quickstart packages in Joomla?
Front-end –
1) Beez3
2) Protostar

Let’s See: How to install the Joomla template on localhost?
Back-end
- Hathor
- isis
How to create a template for Joomla?
Let’s See: How to install the Joomla template on the Server?
Now we are explaining how you can create your own Joomla template. So please have a look following steps:-
Step1
Create a folder with the name of your template for example joomtech inside your Joomla -> Templates folder. OR you can create directly in your window local folder. If you will create a template in your local window folder then after completed, you will need to create a zip file and install it into your Joomla template.
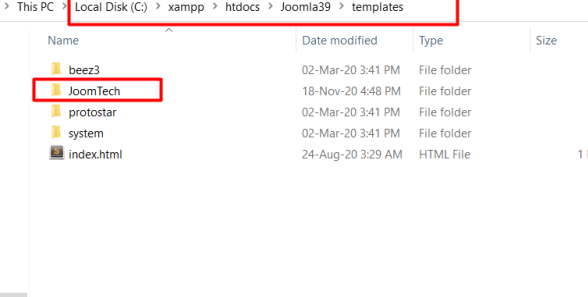
Now create 2 more folders inside your template JoomlaTech folder name as images and CSS to save all images and CSS files.

Step 2 –Inside the JoomTech folder, create a file called templateDetail.xml. This is the main important file of the template, if it will not be included in the folder template will not work. With the help of this templateDetail.xml file, we can define module positions. also, we can define which files and folders will be installed in the template.
<?xml version = "1.0" encoding = "utf-8"?>

<extension version = "3.0" type = "template">
   <name>JoomTech SOlutions</name>
   <creationDate>2020-12-18</creationDate>
   <author>JoomTech Solutions</author>
   <authorEmail>contact@joomtechsolutions.com</authorEmail>
   <authorUrl>https://joomtechsolutions.com </authorUrl>
   <copyright>@ JoomTech Solutions. All rights reserved</copyright>
   <license>GNU/GPL</license>
   <version>1.0.0</version>
   <description>My First Template</description>

   <files>
      <filename>index.php</filename>
      <filename>templateDetails.xml</filename>
      <folder>images</folder>
      <folder>css</folder>
   </files>

   <positions>
      <position>breadcrumb</position>
      <position>left</position>
      <position>right</position>
      <position>top</position>
      <position>user1</position>
      <position>user2</position>
      <position>user3</position>
     <position>user4</position>
     <position>footer</position>
   </positions>

</extension>
Details of the code
<extension version = “3.0” type = “template”> – This tag provides the information about the Joomla version and type of extension, so there is mentioned type=”template” because our extension is a Joomla template.
In Joomla, every extension contains an XML file, and where we have to mention the type of extension.
Here some tags already show means of use like
<name> = name of the template.
<createDate> = Create the date of the template.
<author> = Author name of the template.
<authorUrl> = display the author’s website URL.
<copyright> = Display copyright.
<license> = Display lisence version
<version> = Display the version of template.
<files> = This is the block tag that contains the filename and folder tags.
<folder> = Create the folder in the template.
<positions> = This is the block of positions where positions will be defined.
<position> = name of the positions.
<?php defined( '_JEXEC' ) or die( 'Restricted access' );?>
<!DOCTYPE html>

<html xmlns = "http://www.w3.org/1999/xhtml" xml:lang = "<?php echo $this->language; ?>" lang = "<?php echo $this->language; ?>" >

   <head>                                         //head section
      <jdoc:include type = "head" />
      <link rel = "stylesheet" href = "<?php echo $this->baseurl ?>/templates/system/css/system.css" type = "text/css" />
      <link rel = "stylesheet" href = "<?php echo $this->baseurl ?>/templates/system/css/general.css" type = "text/css" />
      <link rel = "stylesheet" href = "<?php echo $this->baseurl ?>/templates/<?php echo $this->template; ?>/css/template.css" type="text/css" />
   </head>

   <body>                                          //body section
      <jdoc:include type = "modules" name = "top" />
      <jdoc:include type = "component" />
      <jdoc:include type = "modules" name = "bottom" />
   </body>

</html>

?>
About the code
<?php defined( '_JEXEC' ) or die( 'Restricted access' );?>
<!DOCTYPE html>
<html xmlns = "http://www.w3.org/1999/xhtml" xml:lang = "<?php echo $this->language; ?>" lang = "<?php echo $this->language; ?>" >
This code is used to inform the browser which type of HTML page is being used and start the HTML document by describing the language used in the website.
<head>                                         //head section
   <jdoc:include type = "head" />
   <link rel = "stylesheet" href = "<?php echo $this->baseurl ?>/templates/system/css/system.css" type = "text/css" />
   <link rel = "stylesheet" href = "<?php echo $this->baseurl ?>/templates/system/css/general.css" type = "text/css" />
   <link rel = "stylesheet" href = "<?php echo $this->baseurl ?>/templates/<?php echo $this->template; ?>/css/template.css" type = "text/css" />
</head>
The above code is for the header tag and contains the head block of code. and 3 lines for tag lines are used to link the multiple stylesheets for the template in Joomla. It is for the header tag and contains the head block of code. and 3 lines for tag lines are used to link the multiple stylesheets for the template in Joomla.
<body>                                          //body section
   <jdoc:include type = "modules" name = "top" />
   <jdoc:include type = "component" />
   <jdoc:include type = "modules" name = "bottom" />
</body>
The above code is for the body section, where jdoc is used to include the output in Joomla from positions of the Joomla system. The name = “top” is the module position of Joomla that will display at the top position that can be assigned to any module-like menu. and name=”bottom” is another position that will be assigned to any module which will be displayed in the bottom area.
Step 4 − After creating these two files, log in to Joomla administrator and click on Extension → Manager -> Discover and the below page will get displayed.

Let See: Top 10 Free Joomla Templates in 2022
Step 5 − In the above screenshot, click on the Discover link, the following page is displayed. Next, click on the Discover button to discover the newly created template as shown below.
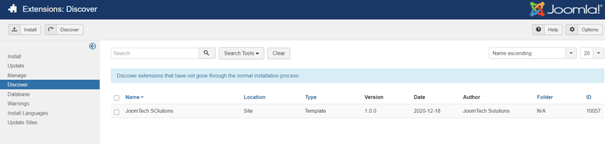
Step 6 − Click on the checkbox to select the template and click on the Install button to install the template in Joomla.
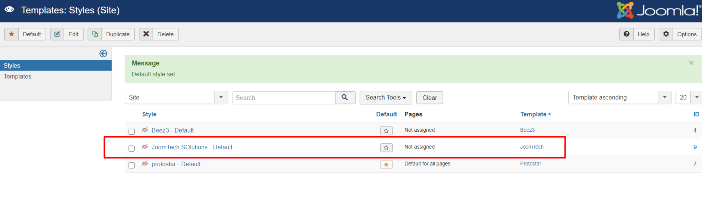
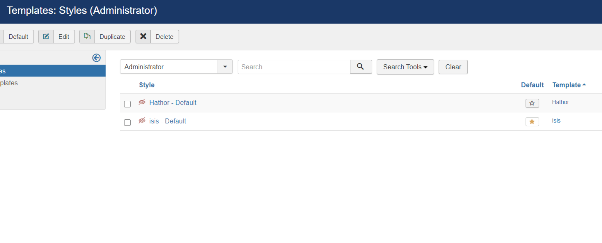
Step 8 − After installing the template you can view your newly created template by clicking on Extension → Template Manager.
You will see your newly created template is listed as shown below.