Last Updated on March 24, 2024
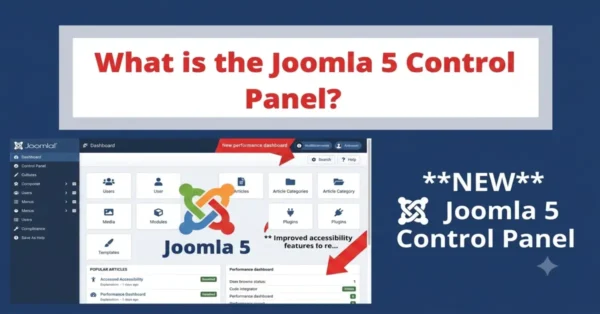
Joomla 5 is an improved version of Joomla and offers more versatile features than the earlier version for website management, including banner management. Banners are essential for advertising, promotions, or highlighting essential content on your website. In this tutorial, we’ll cover the simple steps to manage banners in Joomla 5 effectively.
Learn More: How to use Smart Search in Joomla 5
To manage your banners in Joomla, you should know how to:
There are 4 simple steps to managing Joomla banners, 4th is just tracking the impression of the banner.
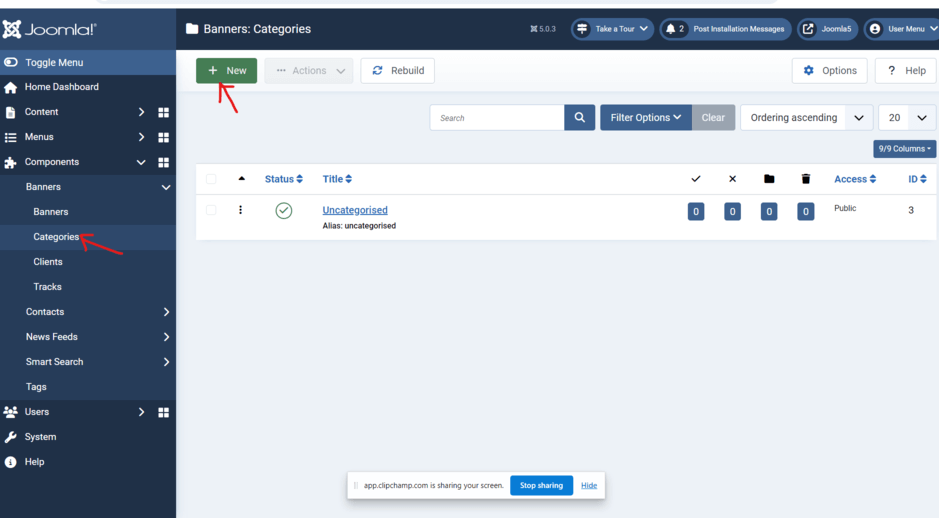
1. Create a Banner Category
The first step is to create banner categories.
- Log into your website administrator, navigate to the Components tab, and then Banners → Categories.
- Click on the New button in the top-left corner.
- Title: Enter the title of the new banner category.
- Category: Enter a description of the new banner category, status, access, etc.
- Options: Set the layout, image, etc.
- Publishing: Date, Author, Meta details, etc.
- Permissions: Manage the permissions for the different user groups on your website.
Learn More: Create a Custom Administrator Module for Joomla 5

- Click on the Save & Close button to create your banner category.
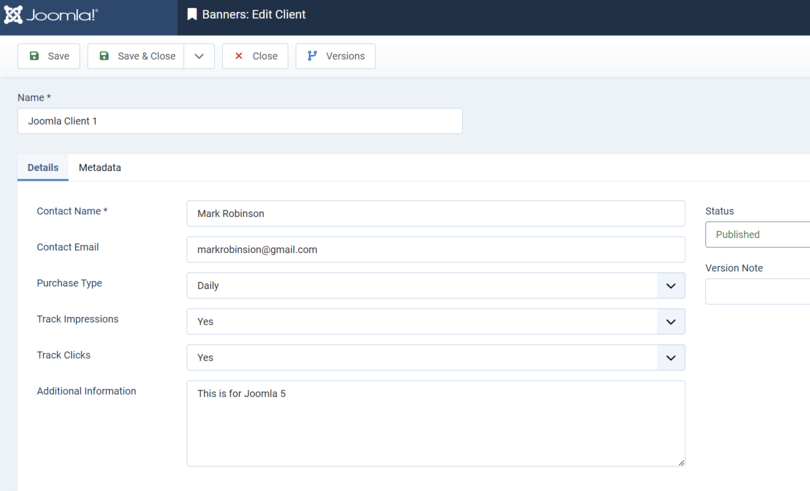
2. Create Banner Clients
Second, to create your banners client, go to the Components tab and then Banners → Clients

Click on the New button at the top-left corner.
Edit the following fields:
- Name: Enter the name of your client.
- New Client: Enter the contact details of your client, like Contact Name, Contact Email, etc.
- Metadata: Edit the metadata information for the new client
Learn More: Joomla Component Development Tutorial Step by Step
3. Create Banners in Joomla 5
Now that you have completed setting up a banner category and your banner client, you may proceed with the creation of your website banner. To do so, go to the Components tab and then Banners –> Banners.

Click on the New button at the top-left corner.
Fill in the following fields:
- Name: Enter a name for your new banner, “Top Banner.”
- Details: Enter the details for your new banner, such as the type (image or custom), upload image, click URL, etc.
- Banner Details: Select the banner client, and enable tracking of impressions, clicks, Purchase type, etc.
- Publishing: Start/Finish date, Author, Meta data.
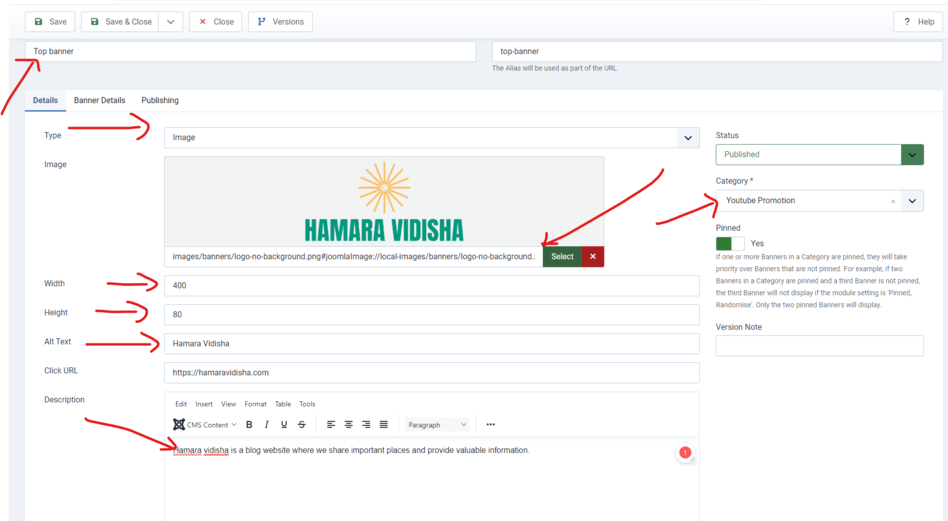
- Click on the Save & Close button to create your banner.
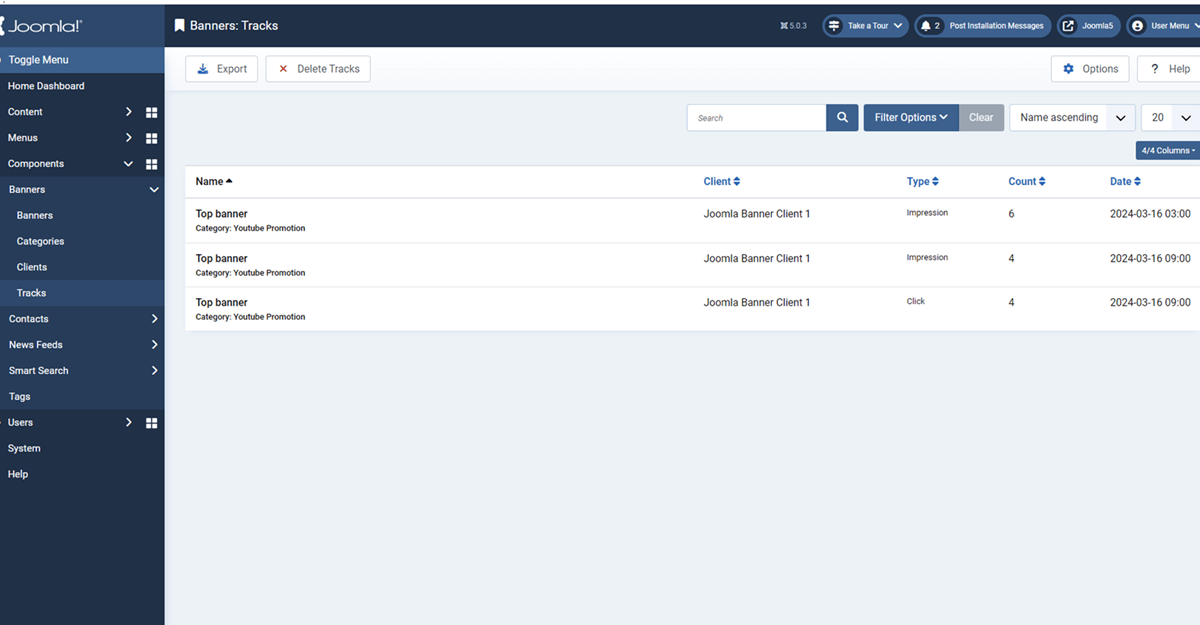
4. Tracks the Banners
This is not a required step, after running your banners on your Joomla website, you would like to track the impressions and the banner’s performance.
So you can check the details here:
- Name: this is the name of the banners
- Client: this is the client name showing all banners
- Type: this column shows the type of banner activity, like an impression or click (clicked by visitors)
- Count: It is the counting of banner impressions or clicks.
- Date: When banners are displayed on the website, it has noted the date and time.
Stay updated with our latest news, special offers, and exclusive updates directly in your inbox.