
Last Updated on November 1, 2024
Whether you’re aiming for a sleek and minimalist aesthetic for your website or you have specific areas where you prefer not to display images, knowing how to hide a featured image on a post in WordPress can be a valuable skill. With this ability, you can customize the appearance of your posts and pages, giving you more control over the visual presentation of your content.
In this guide, we will take you through the process of hiding a featured image on a post in WordPress, empowering you to achieve the desired look and layout for your website. Whether you’re a beginner or an experienced user, these instructions will equip you with the knowledge needed to effectively manage featured images in WordPress. Let’s dive in and learn how to hide a featured picture on your WordPress site.
How to Hide Featured Image on Post:
WordPress provides a convenient feature called “featured images” that automatically activates them for all posts by default. However, this can become problematic when you hide a featured image on a specific post without affecting others. Unfortunately, WordPress doesn’t offer an easy solution for selectively hiding featured images, leaving users in a predicament.
It’s a common frustration when you desire more flexibility in managing the visibility of featured images on your website. In this guide, we will address this challenge and present effective methods to hide a featured image on a single post while preserving its display on other posts. By following these techniques, you’ll gain the ability to finely customize the appearance of your WordPress website, ensuring that each post reflects your desired design. Let’s explore the solutions that enable you to hide featured images selectively in WordPress.
Fortunately, there are multiple approaches you can take to hide a featured image in WordPress. These methods can be implemented through:
- Not uploading a featured image for specific posts.
- Using your theme’s settings to hide featured images (if available).
- Hiding featured images with code.
- Conditionally hiding featured images using a plugin.
You can use any one method so, keep reading to learn about them all.
Method 1: Not uploading a featured image for specific posts.
The first method is a simple and straightforward approach.
To “hide” featured images on both the blog list and individual posts, you can choose not to upload any featured images in the first place. Alternatively, if you have already uploaded featured images, you can delete them.
For instance, in the example provided, we have deliberately left the Featured Image section empty within a post, ensuring that no image will be displayed as the featured image. This method requires no additional steps or modifications, making it an easy way to achieve the desired result.
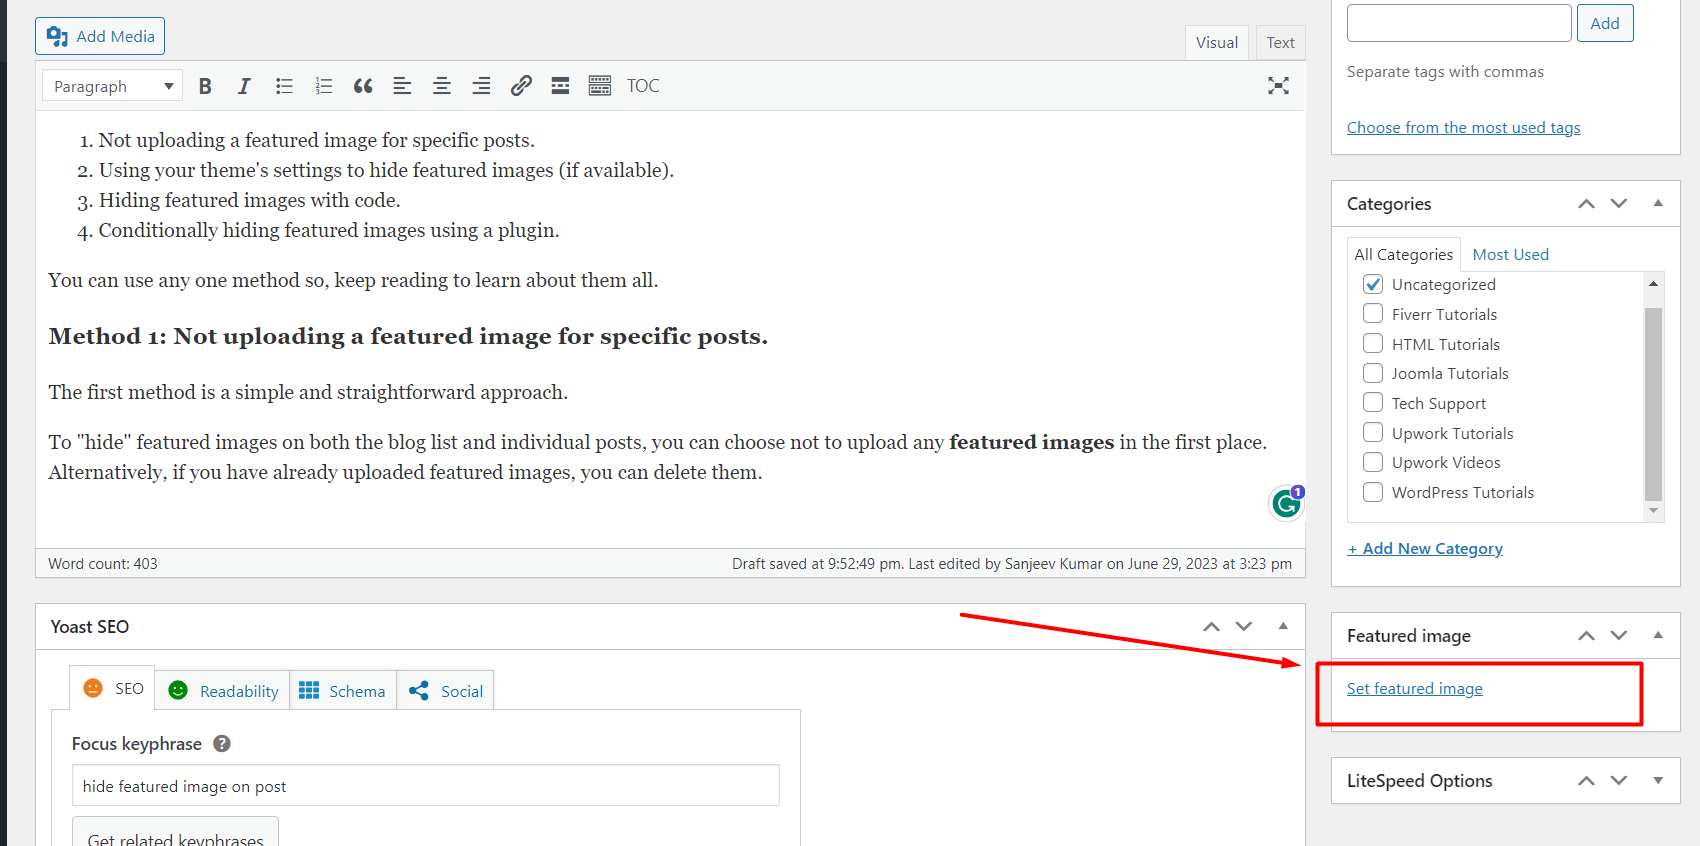
First, you have the option of not uploading an image in the first place when creating a post. By omitting the featured image upload step, no image will be displayed as the featured image.

Alternatively, if you have already uploaded a featured image for a post and want to hide it, you can click on the “Remove Featured Image” button. This action will remove the uploaded image and prevent it from being displayed as the featured image.
After saving or updating the post, there’s no featured image that appears on the post.

That post also lacks a featured image on the listing page (where all posts are listed), whereas other posts with featured images still show them.

However, it is essential to test the appearance of the blog listing page on your chosen theme, as it may appear unconventional in certain cases when a featured image is not uploaded.
Read More: How to Become a WordPress Developer?
Method 2: Use your theme’s settings to hide featured images (if available).
When you have a website or a blog using a specific theme, there are often settings available within that theme that allow you to customize its appearance and functionality. One such setting may be the ability to hide or display featured images.
By accessing the theme settings, you can explore the various customization options provided. Look for a specific setting related to featured images. If available, you’ll likely find a checkbox or toggle that allows you to enable or disable the display of featured images.
By selecting the option to hide featured images, the theme will apply this setting across your website, ensuring that the featured pictures associated with your posts or pages are not visible to your visitors.
This option is mostly available in paid themes, but free WordPress themes have very little chance to provide that.
Method 3: Hiding featured images with code.
Hiding featured images with CSS code is the most technical method, but it gives you the power to target the specific posts where you want to hide the featured image.
However, you might need to know some basic CSS to adapt these snippets to your theme.
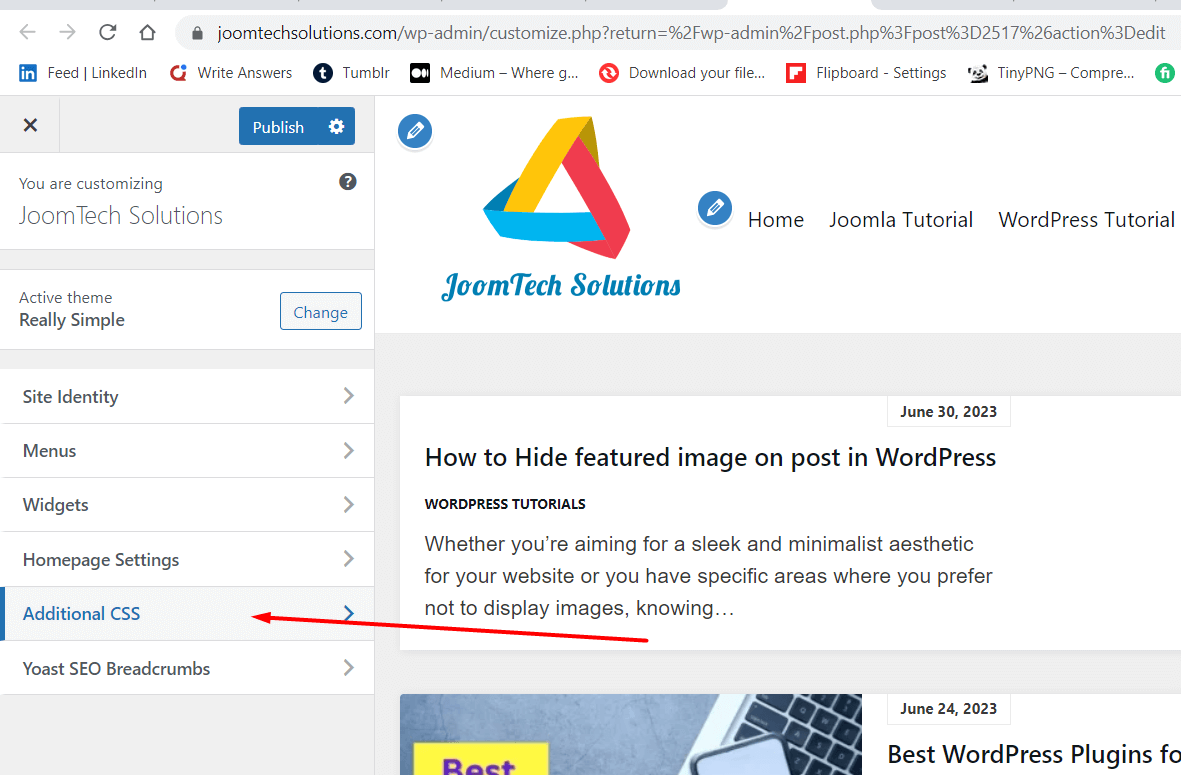
To hide the featured image for a certain post using CSS, go to Appearance > Customize, then navigate to Additional CSS.
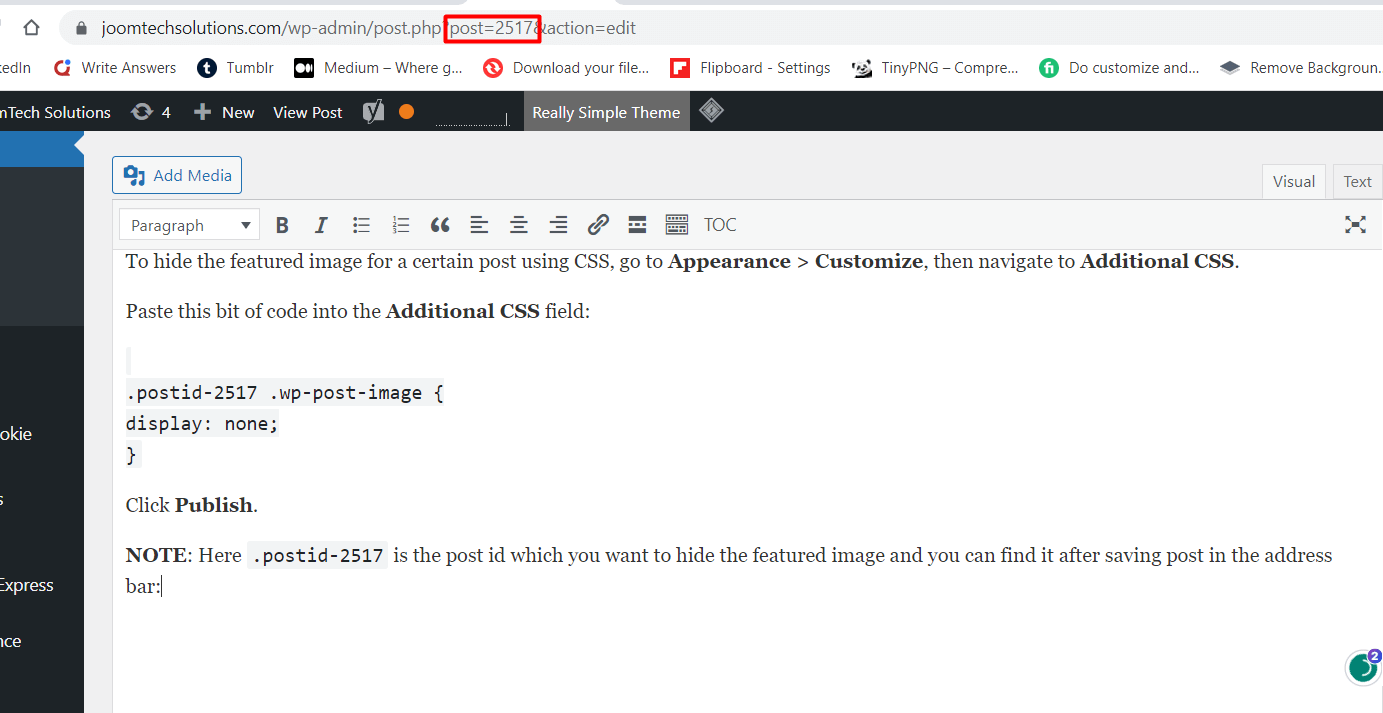
Paste this bit of code into the Additional CSS field:
.postid-2517 .wp-post-image {

display: none;

}
Click Publish.
NOTE: Here if you want to hide from all posts then you have to remove the CSS class (.postid-2517) and if you want to hide from only a single post then add the post id class(.postid-2517) the post id which you want to hide the featured image and you can find it after saving the post in the address bar:
Read More: How to use WordPress to Create a Website
Method 4: Conditionally hide featured images using a plugin.
Suppose you want to hide or show featured images selectively on certain pages. In that case, there’s a plugin called “Conditionally display featured image on singular posts and pages” that can help with that.
To put it simply, this plugin allows you to hide a featured image on specific pages using an easy-to-use tool.
Here’s how you can use the “Conditionally display featured image on singular posts and pages” plugin:
- Install the plugin:
- Access your WordPress dashboard.
- Navigate to the “Plugins” section and click on “Add New.”
- Search for “Conditionally display featured image on singular posts and pages” and select it.
- Click on “Install Now” and then “Activate” to enable the plugin.
2. Open any post, and you can see a checkbox with the text “Display featured image in post lists only, hide on singular views.” below of Set featured image.
3. You can check or uncheck accordingly to hide or show the featured image on that post.
Read More: Best Page Builders for WordPress
Summary
The article provides a concise guide on how to hide a featured image on a WordPress post. It explains that sometimes you may want to hide the featured image on specific posts, and it offers a solution using a plugin.
The plugin mentioned in the article “Conditionally display featured image on singular posts and pages.” The article highlights the benefits of using this plugin and provides step-by-step instructions on how to install and configure it.
By following the instructions, users can easily hide the featured image on their desired posts, improving the visual presentation of their WordPress website.
Stay updated with our latest news, special offers, and exclusive updates directly in your inbox.