In this article, we will learn How to upgrade the PHP version in Windows 10 in XAMPP.
XAMPP is a complete installation package for the Apache Web Server, MySQL, PHP, Perl, FTP Server, and phpMyAdmin on Linux, Solaris, Windows, and Mac OS X. It also allows you to manage Apache Web Server, MySQL, and PHP. Despite the fact that XAMPP is constantly updated, it may be necessary to utilize the most recent version of PHP until XAMPP includes it in its distribution.
You need to follow the following 6 steps to upgrade the PHP version in Windows 10.
You can also follow the tutorials on How to install XAMPP on Windows 10.
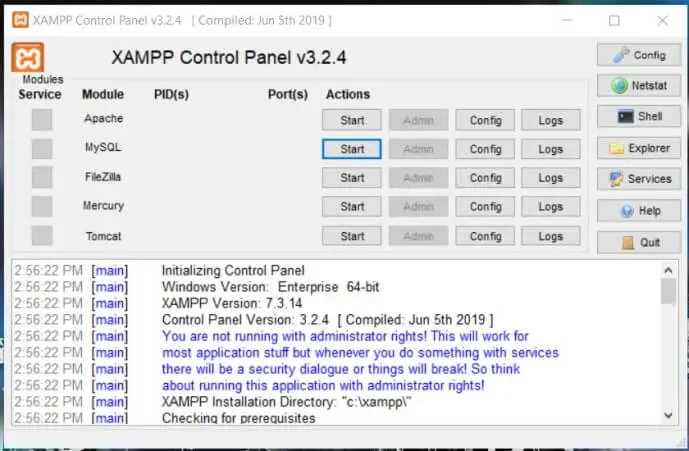
Step 1: Open the XAMPP Control Panel.
As seen in screenshot 1, open the XAMPP Control Panel.
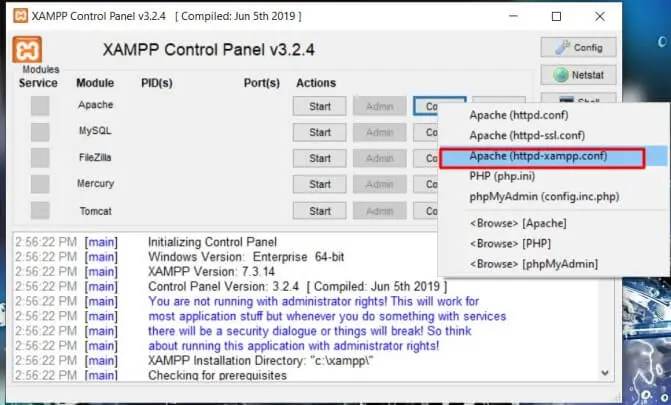
Step 2: Open the Apache Configuration Panel.
Next to Apache, click the Config button. It will display the setting options displayed in screenshot 2.
Let See: How to fix Apache not starting on XAMPP
Step 3: Browse to the Config File.
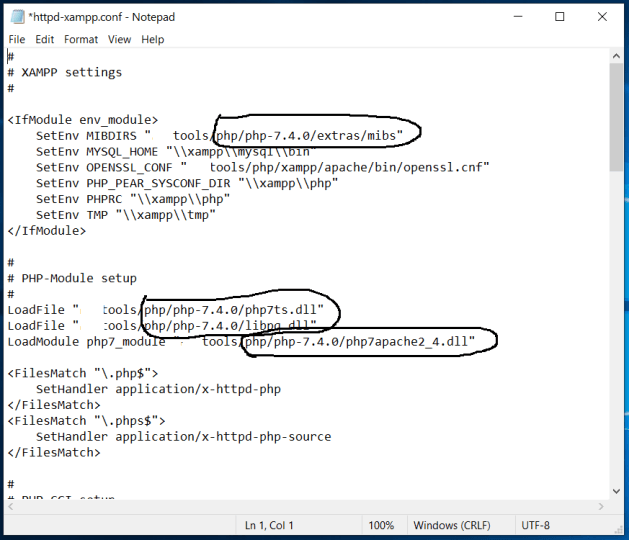
Select the Apache (httpd-xampp.conf) option, as shown in Fig 2. It will open the httpd-xampp.conf configuration file, as illustrated in screenshot 3.

Step 4: Modify the PHP Installation Path
In screenshot 3, I’ve highlighted a few PHP settings. While writing this post, I installed the most latest version of PHP, PHP 7.4.0, by following How To Install PHP 7 On Windows. In addition, as seen in screenshot 4, I have modified the PHP installation path.
Let See: Which one is better, XAMPP or WAMP
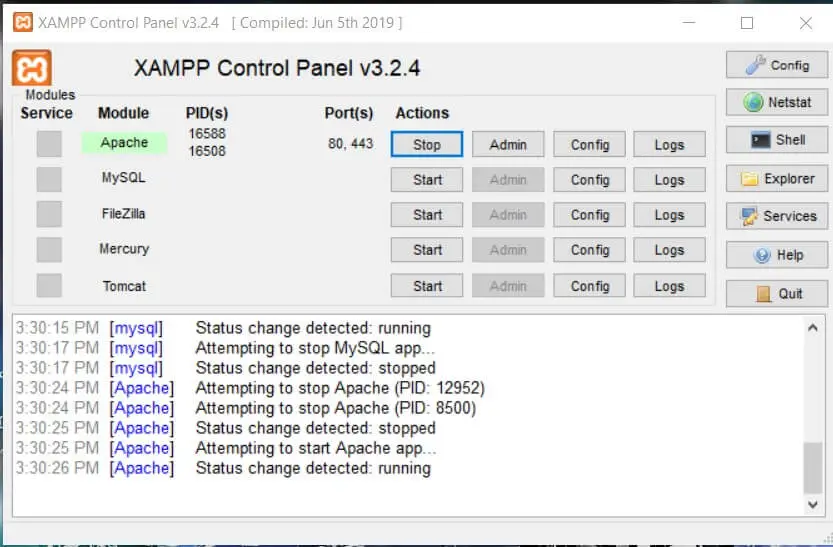
Step 5: Save the configuration and start Apache.
Save your modifications and start Apache Web Server. As illustrated in screenshot 5, it will display the Apache status.
Step 6 – Verify PHP
In this step, we will check the PHP version that XAMPP is using. Open a browser and type http://localhost into the address bar. The XAMPP Dashboard will be displayed. Now, as shown in screenshot 6, click on the PHPInfo Link to see the PHP information page.
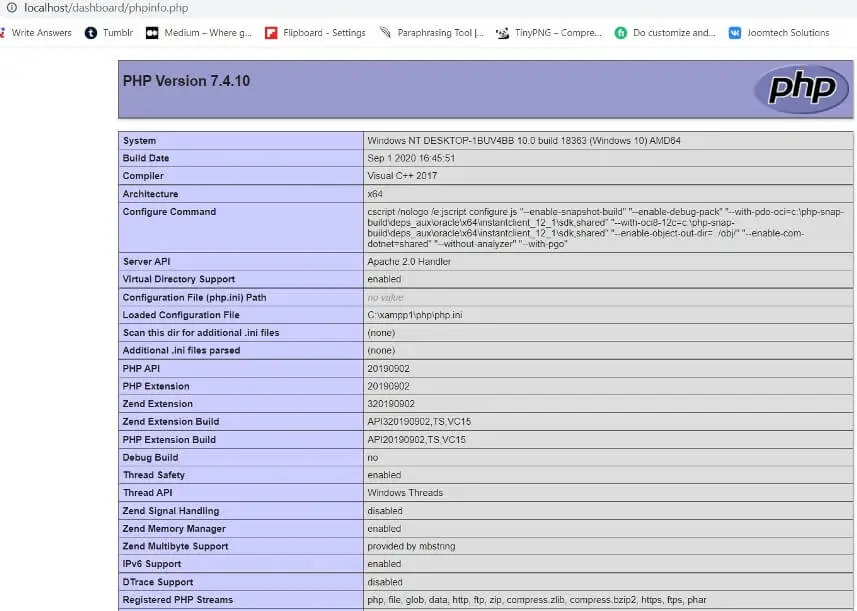
It reflects the most recent PHP version, PHP 7.4, as shown in Fig 6.
Summary
We explored how to use different versions of PHP with XAMPP by configuring the Apache configuration file in this article. I’ve outlined all of the steps necessary to upgrade the PHP delivered by XAMPP to the most recent version of PHP, PHP 7.4.
See More:

